Plugin Install
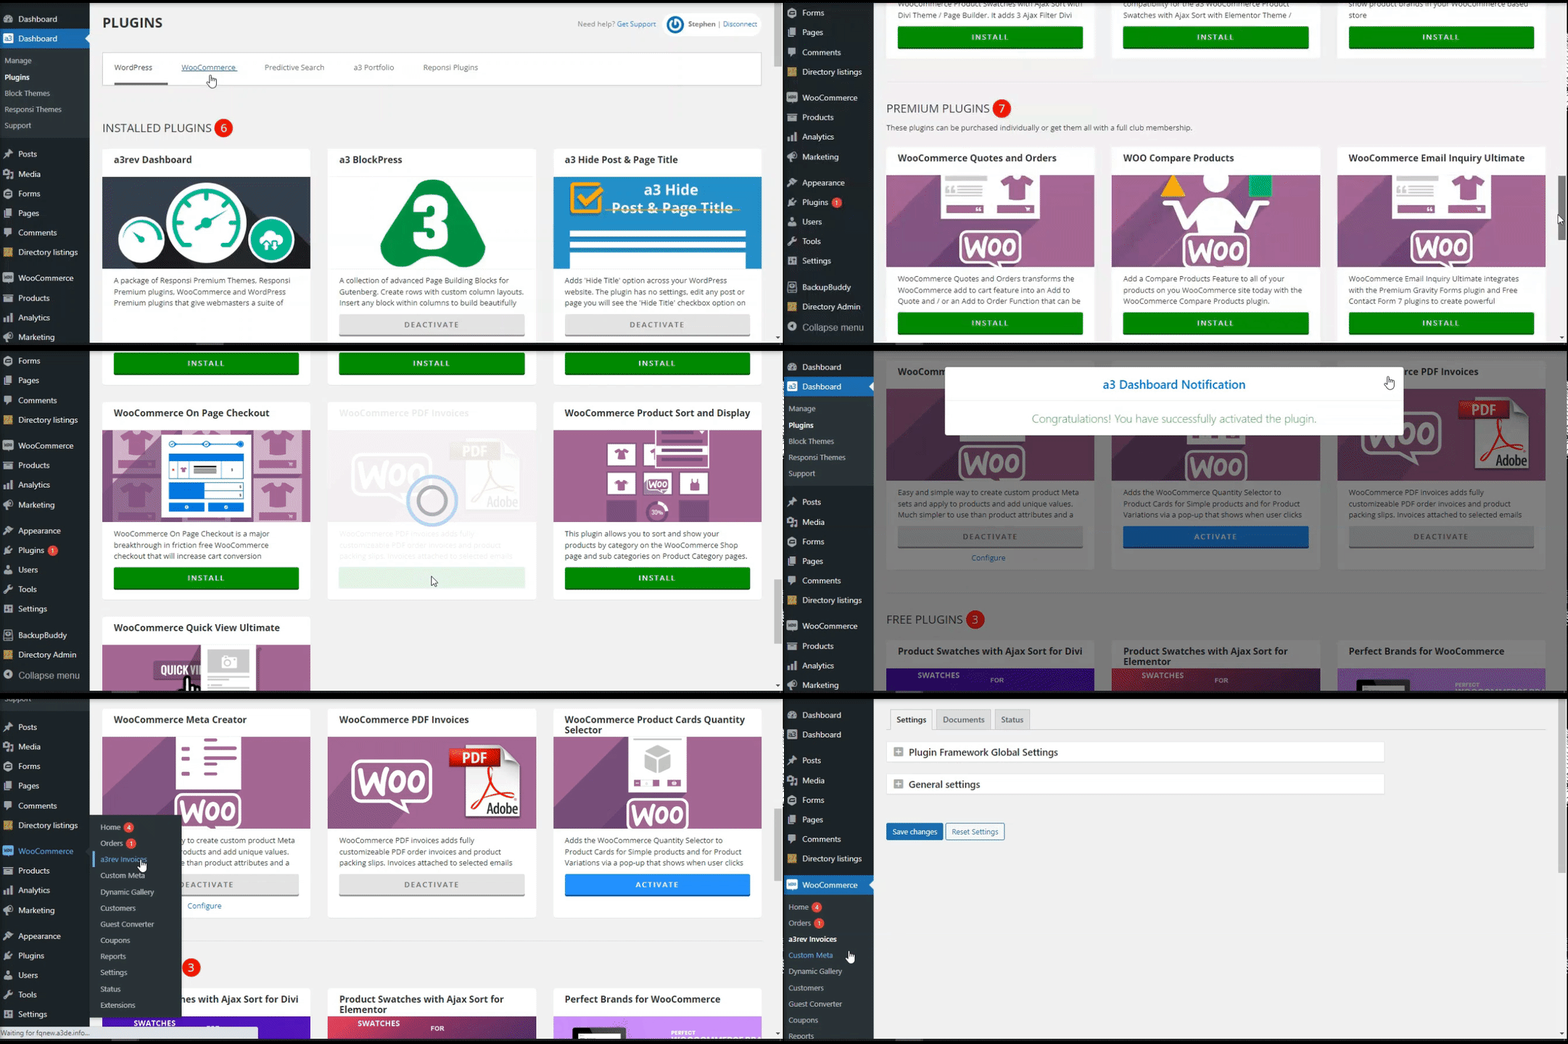
The plugin is available on a3 Dashboard > WooCommerce Plugin. Find the PDF Invoices plugin on the list, install and then activate it.
After the plugin is activates it auto-creates a PDF Invoices admin section on your WooCommerce menu.
Overview
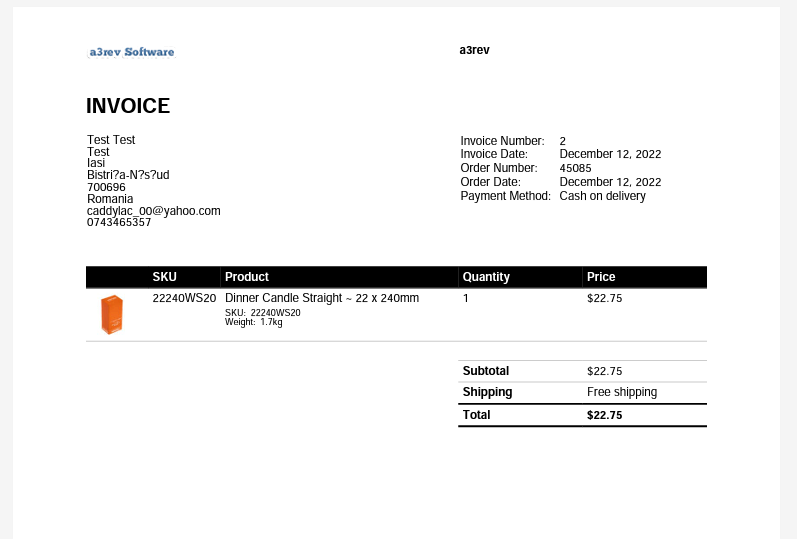
WooCommerce PDF invoices adds fully customizeable PDF order invoices and product packing slips. Invoices attached to selected emails and for customers from My Account, Orders menu.
PDF Invoices Settings
From this panel we can set the general settings for the plugin.
Plugin Framework Global Settings
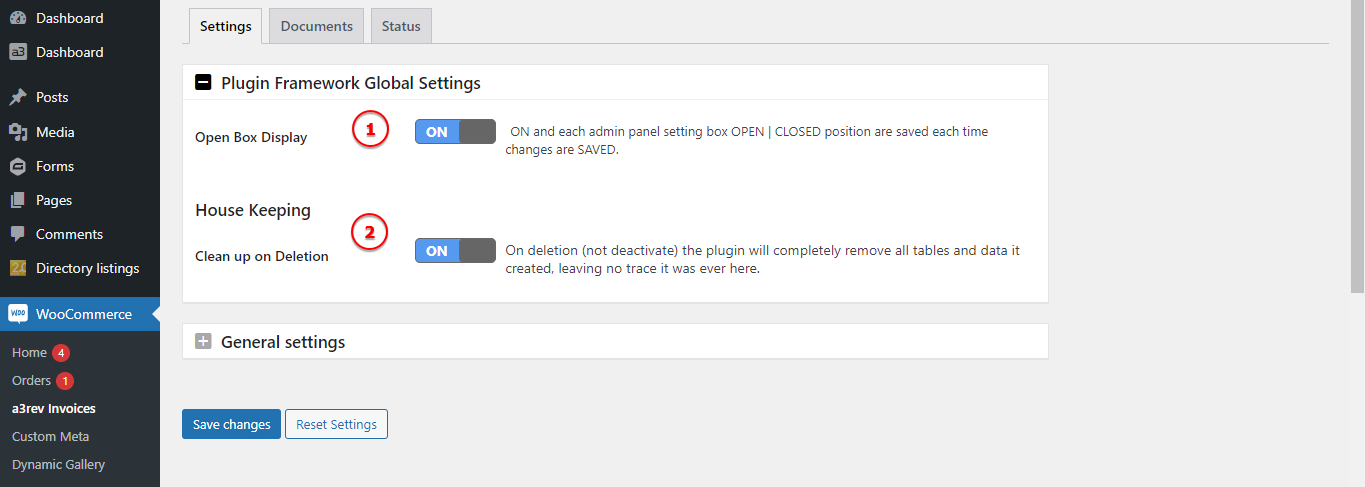
Image Legend:
1. Open Box Display – ON and each admin panel setting box OPEN | CLOSED position are saved each time changes are SAVED.
2. Clean up on Deletion – On deletion (not deactivate) the plugin will completely remove all tables and data it created, leaving no trace it was ever here.
General settings
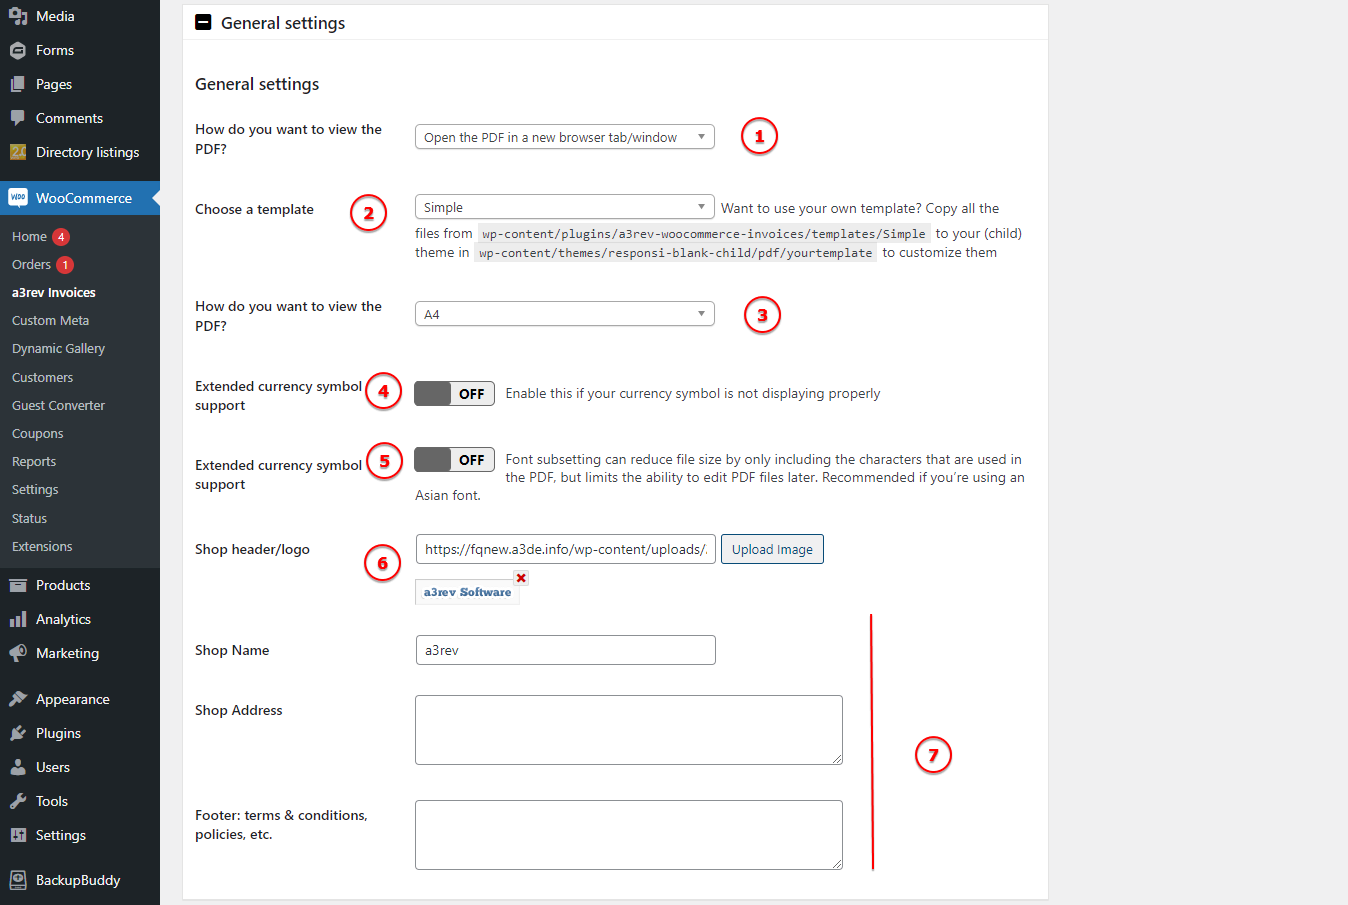
Image Legend:
1. How do you want to view the PDF? – Choose from to Download the PDF or Open the PDF in a new browser tab/window.
2. Choose a template – Want to use your own template? Copy all the files from wp-content/plugins/a3rev-woocommerce-invoices/templates/Simple to your (child) theme in wp-content/themes/responsi-blank-child/pdf/yourtemplate to customize them.
3. How do you want to view the PDF? – You can set to be view as a a4 format or letter.
4. Extended currency symbol support – Enable this if your currency symbol is not displaying properly.
5. Extended currency symbol support – Font subsetting can reduce file size by only including the characters that are used in the PDF, but limits the ability to edit PDF files later. Recommended if you’re using an Asian font.
6. Shop header/logo – Upload a logo to show on the header of the invoice.
7. Organization Info – Add extra info like Shop Name or address.
Document Setting
Setup what will show inside the invoice such as: invoice number, display billing address customize how the product show on document and many more settings.
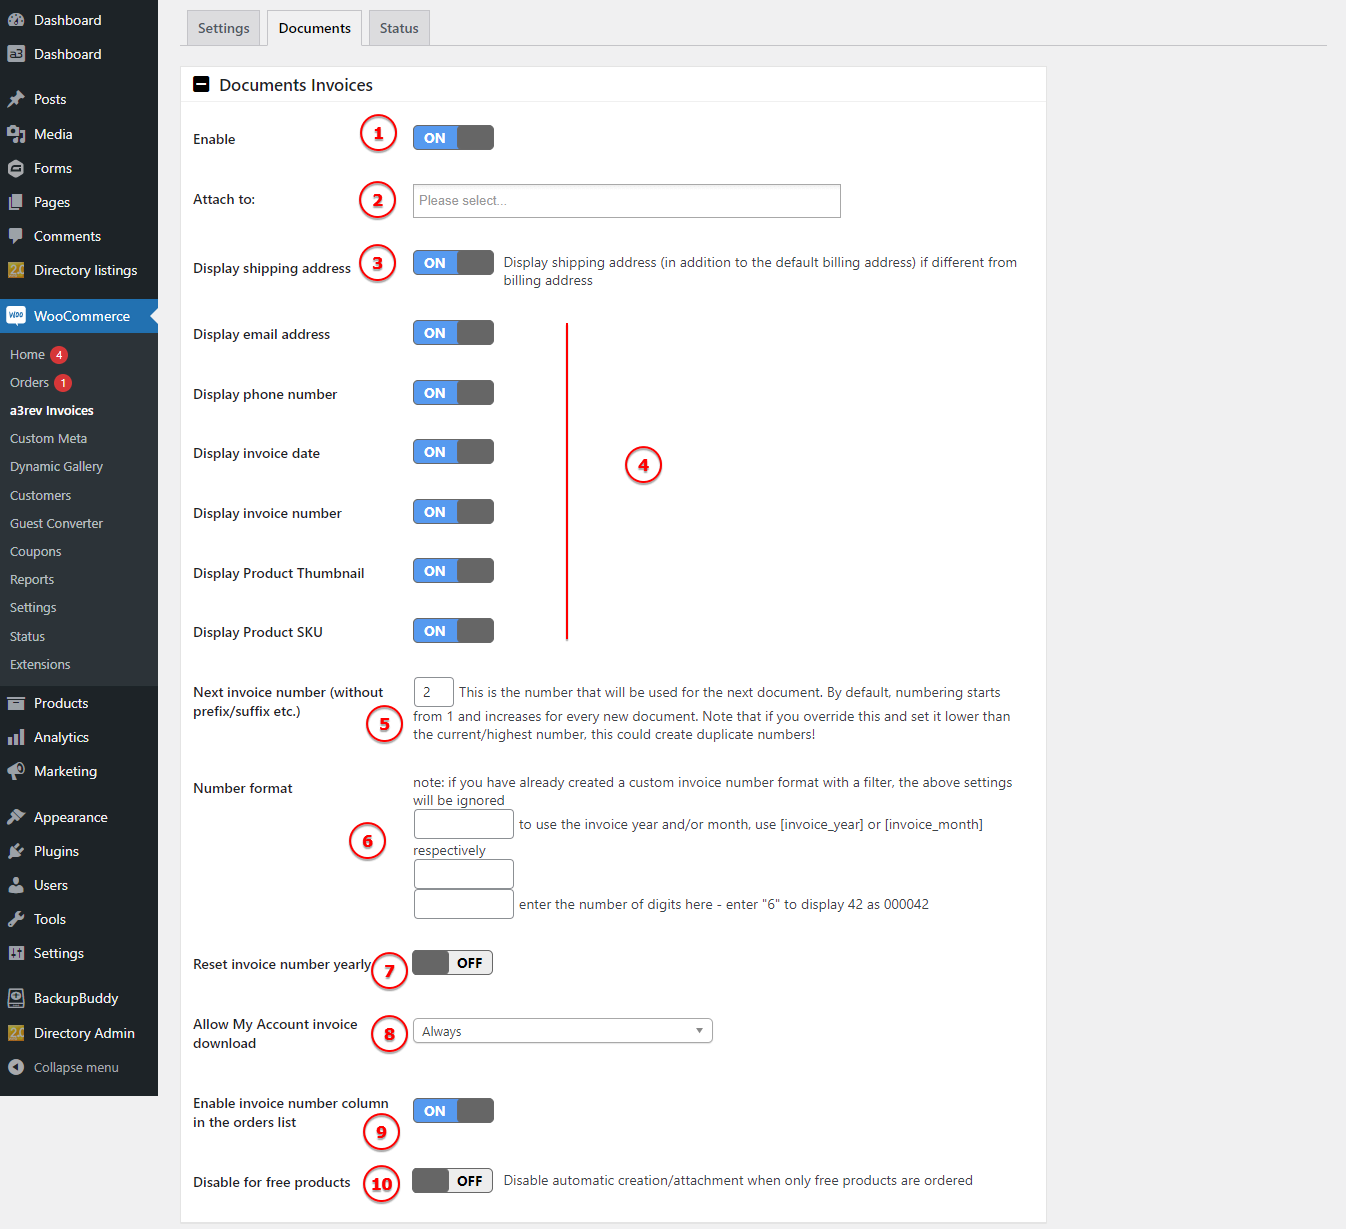
Image Legend:
1. Enable – Turn On or Off the the document invoice info.
2. Attach to – you can attach the invoice to a specific action like: Cancelled order, Failed order, Order on-hold, Processing order, Completed order, Refunded order, Customer invoice / Order details (Manual email).
3. Display shipping address – Display shipping address (in addition to the default billing address) if different from billing address.
4. Display different data on invoice document like: invoice number, invoice date, phone, SKU, product thumbnail etc..
5. Next invoice number (without prefix/suffix etc.) – This is the number that will be used for the next document. By default, numbering starts from 1 and increases for every new document. Note that if you override this and set it lower than the current/highest number, this could create duplicate numbers!
6. Number format – If you have already created a custom invoice number format with a filter, the above settings will be ignored. To use the invoice year and/or month, use [ invoice_year ] or [ invoice_month ] respectively.
7. Reset invoice number yearly
8. Allow My Account invoice download
9. Enable invoice number column in the orders list
10. Disable for free products – Disable automatic creation/attachment when only free products are ordered.
Documents Packing Slip

Image Legend:
Enable if to show the billing address, email or phone on invoice document.
Status, Debug and Permissions
From those 3 panel you can debug, check the system information and see the permissions.
Debug settings
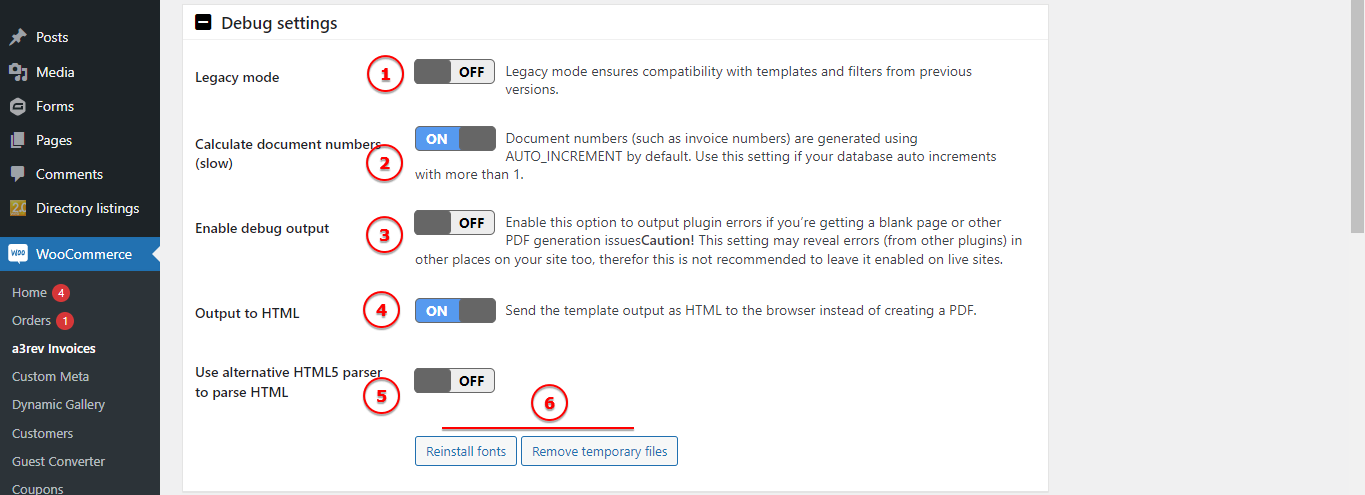
Image Legend:
1. Legacy mode – Legacy mode ensures compatibility with templates and filters from previous versions.
2. Calculate document numbers (slow) – Document numbers (such as invoice numbers) are generated using AUTO_INCREMENT by default. Use this setting if your database auto increments with more than 1.
3. Enable debug output – Enable this option to output plugin errors if you’re getting a blank page or other PDF generation issues.
Caution! This setting may reveal errors (from other plugins) in other places on your site too, therefor this is not recommended to leave it enabled on live sites.
4. Output to HTML – Send the template output as HTML to the browser instead of creating a PDF.
5. Use alternative HTML5 parser to parse HTML
6. Use those 2 buttons to Reinstall Fonts or Remove Temporary Files.
System Configuration

Image Legend:
From this panel you can check the system info requirements.
Write Permissions
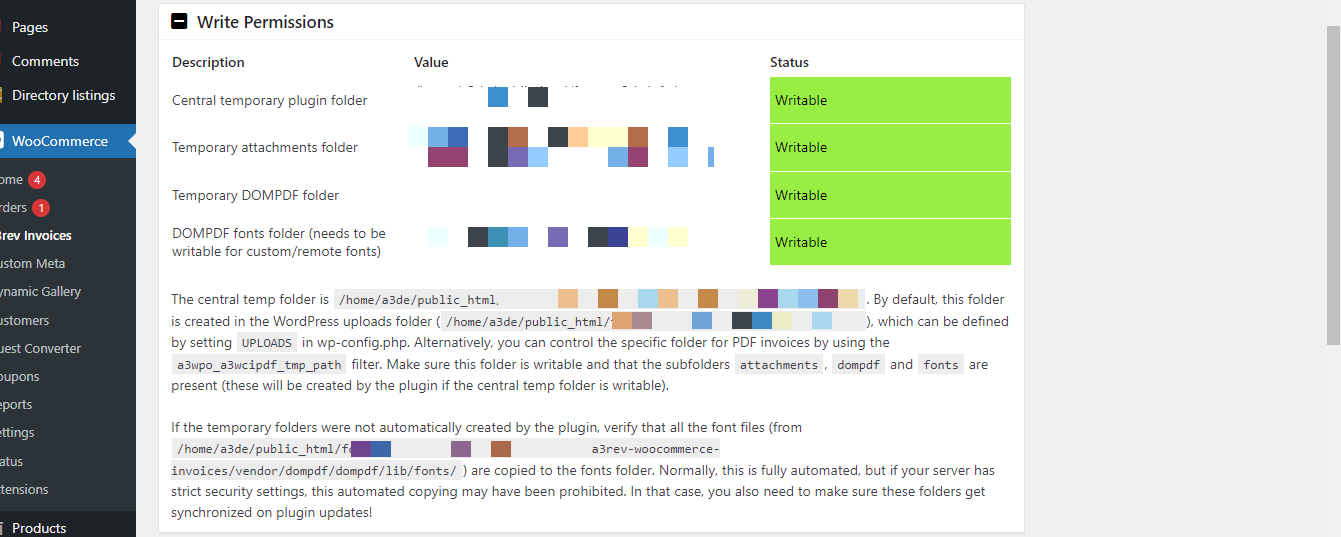
Image Legend:
See what folders are writable and where you can find the temporary folders. You can control the specific folder for PDF invoices by using the a3wpo_a3wcipdf_tmp_path filter.
