Getting Started
The Post Carousel block by a3 BlockPress Builder enables you to create carousel slideshows dynamically sourced from the posts, pages, or custom post types of your website. Just pick a set of posts, pages, projects or testimonials based on category, tags, or custom post and display a responsive carousel slider for the Gutenberg editor.
So you can present the content of your blog articles, WooCommerce products, hotel rooms, specific pages or posts and other categorized content elements automatically in a carousel block, which supports automatic slideshows. If you are using the FSE (full site editor) theme you can easily build post layouts from template files.
With a3 Post Carousel block’s flexibility, you’ll be able to selectively feature posts or pages only from a specific category or by IDs or exclude specific posts. Since this Carousel block for Gutenberg is highly customizable, you’ll also have a chance to completely modify the look of a carousel, including its layout and content.
This guide will show you how to configure a blog list layout with the block.
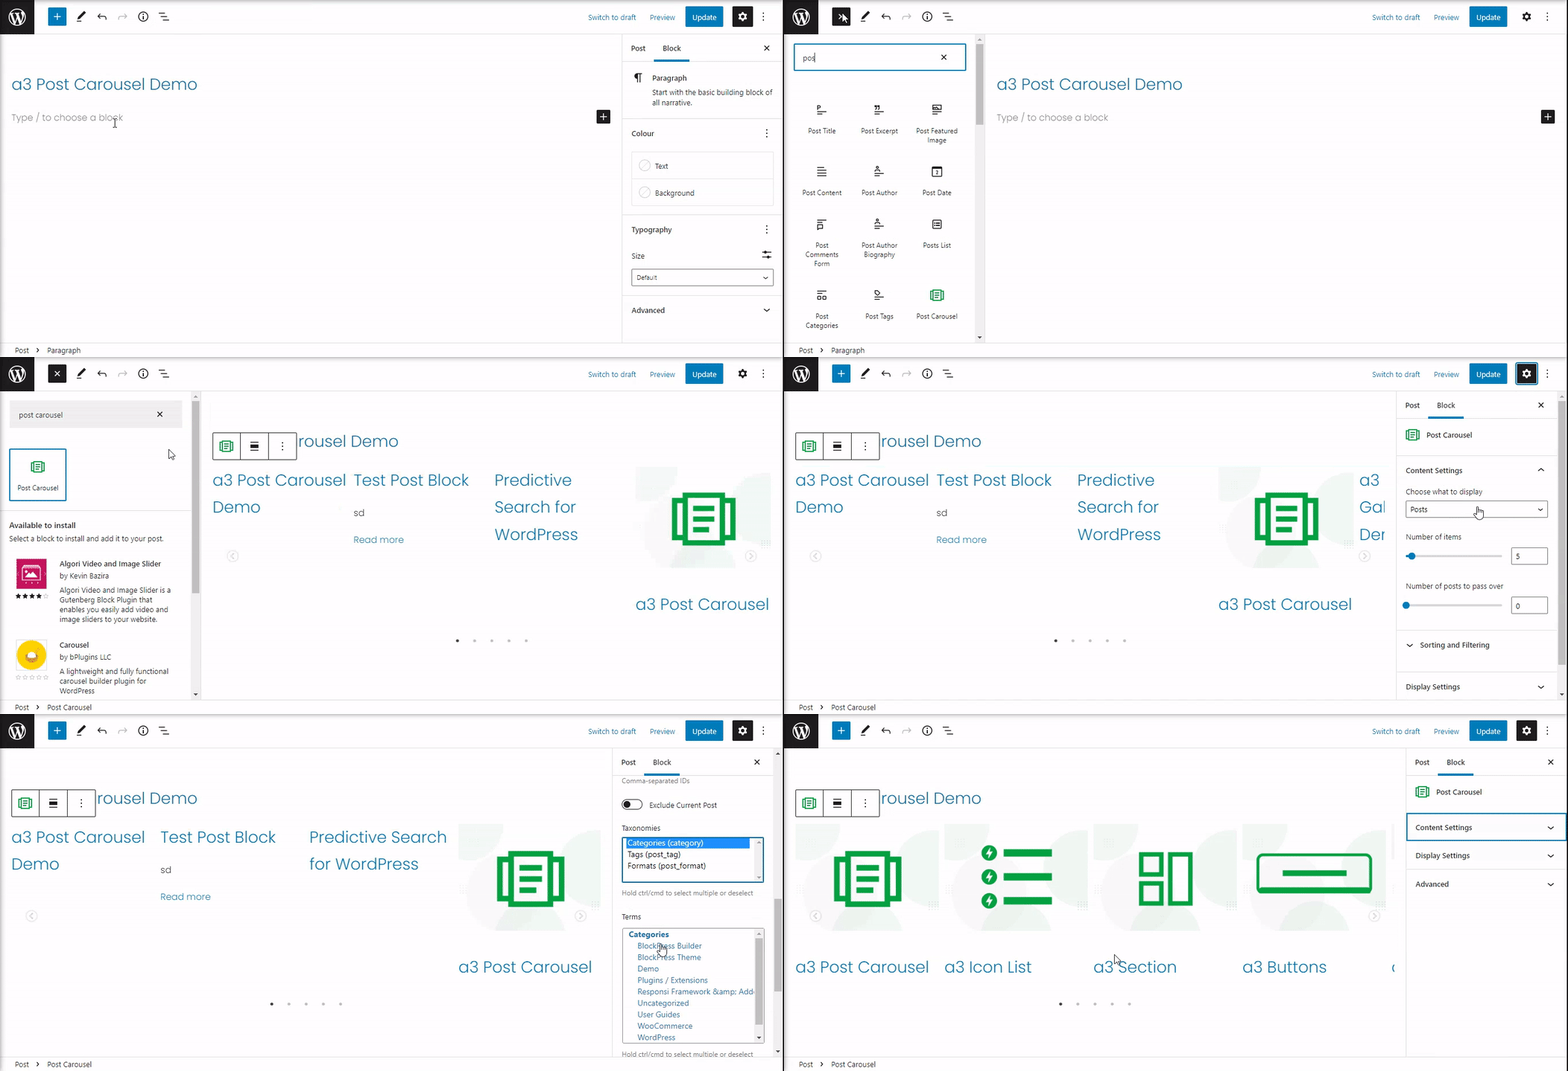
So to get started chose the a3 Post Carousel block from a3 BlockPress list or type the name of the block. Click on the + Block Inserter icon and search for “Post Carousel”. Click it to add the block to the post or page.
Content Settings
After inserting the block, you will find a slideshow of your most recent posts. In order to appear in the slideshow, posts must be published.
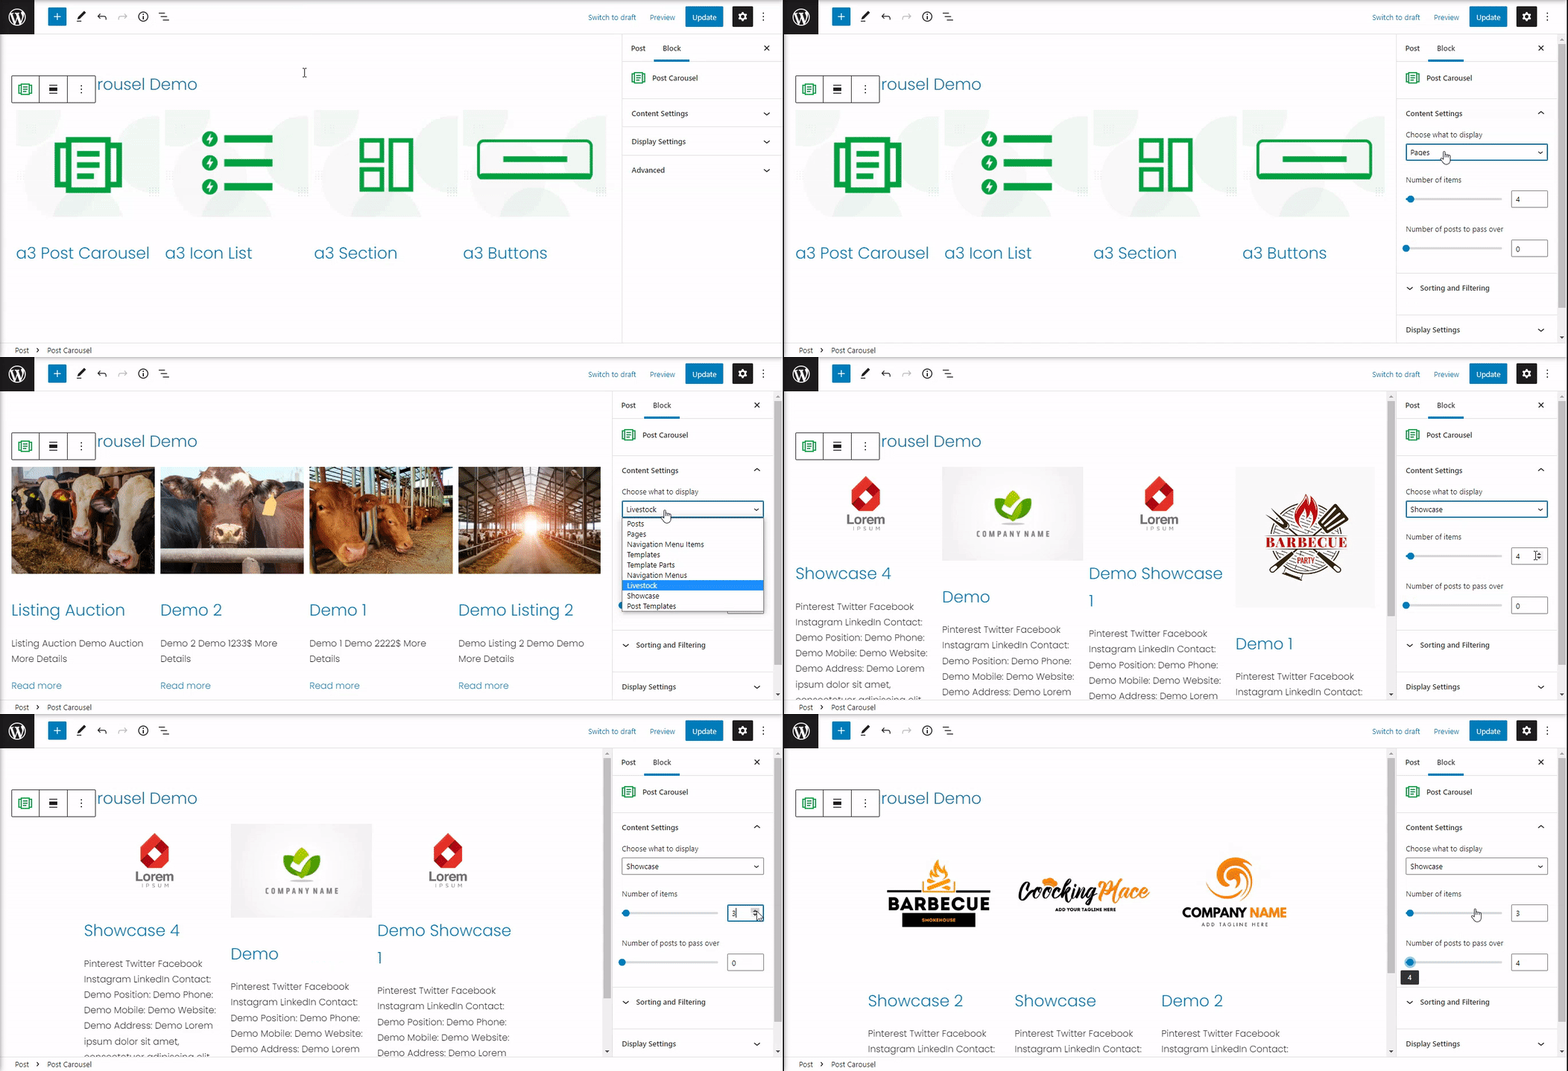
First thing to do is select the source for your carousel posts: the list of available slides depends on the plugins activated on your website, it’s automatically fetched data. You can’t edit the content of the slides in Gutenberg; in case you need to change it, go to the exact post or page and update it there.
Next select the number of items to display in the WordPress post slider carousel. Also you can choose how many number of posts to pass over.
Sorting and Filtering
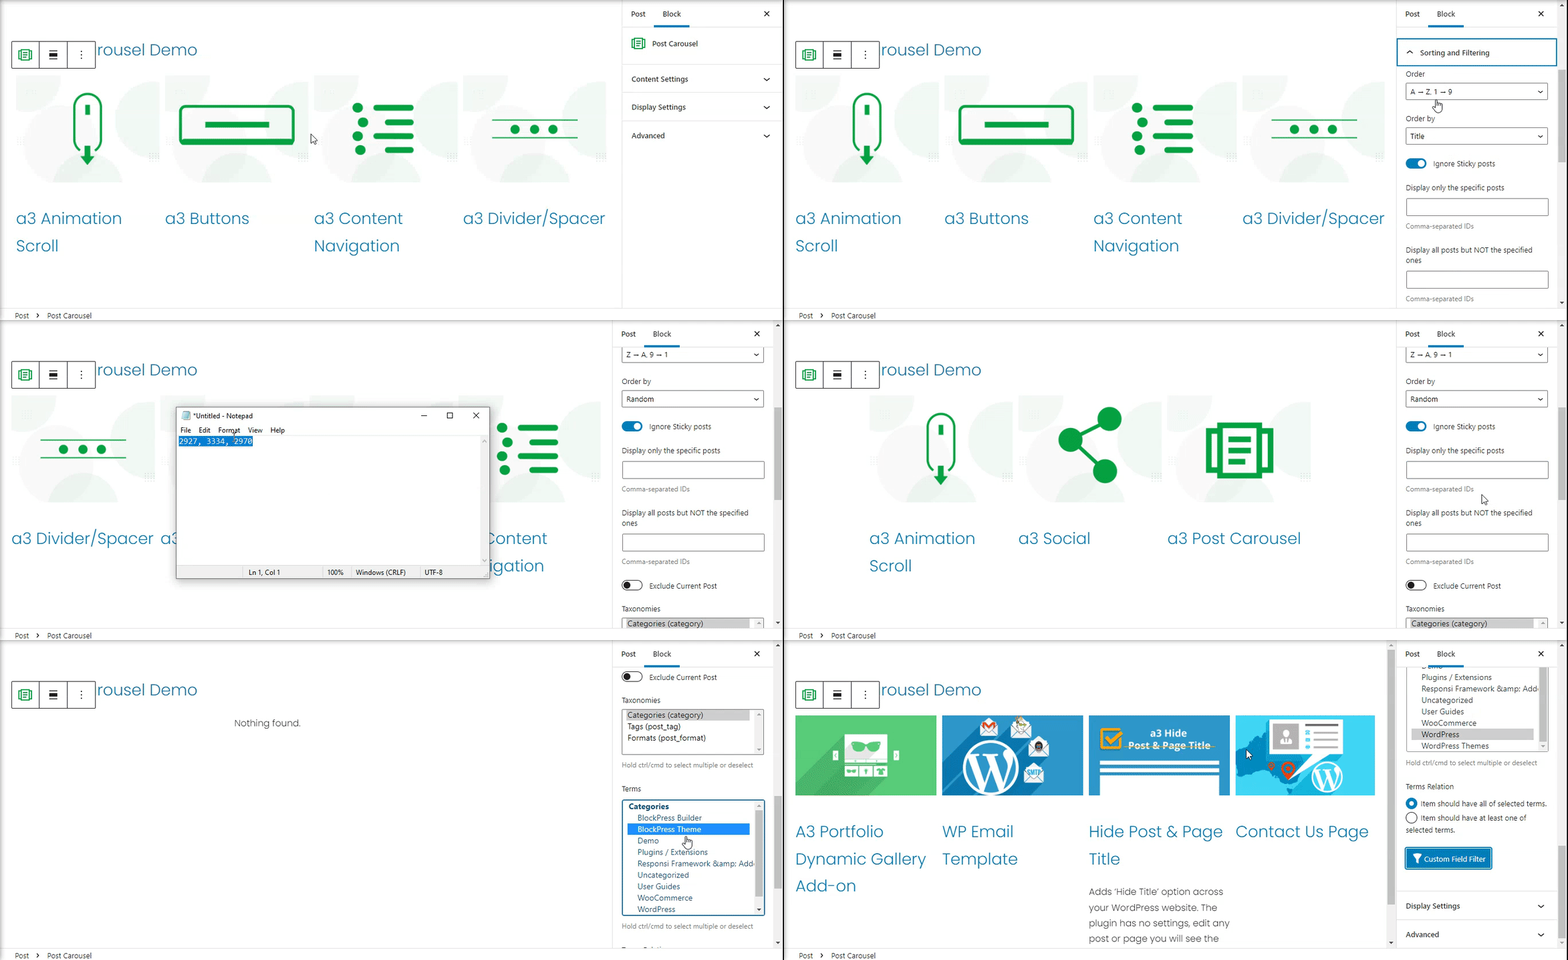
Going through the sorting and filtering options, you may designate the preferable order for slides, display them by:
- Title
- Date
- Random
- Last modify date
- Menu order
Setup your custom rule taxonomy displaying only the specific posts or exclude them by ID’s. Or choose from your taxonomy a Category and select the terms specific to it. Hold ctrl/cmd to select multiple or deselect. The “Term relations” feature indicates whether each post within a taxonomy must correspond to all tags (‘Item should have all of selected terms’) or have at least one of them (‘Item should have at least one of selected terms.’).
Display Settings
On Display Settings you can adjust the look of the carousel. Select the number of slides (posts) to show based on the device. You can also set slideshow speed, spacing between slides and choose whether the slides must rotate infinitely.
You can customize the look of the post card and what will be display in it. There are 2 option for it:
- Carousel Template – Create a new template with FSE (full site editor) or edit the current one. With our collection of Post Template Blocks you can have the full control of your post cards.
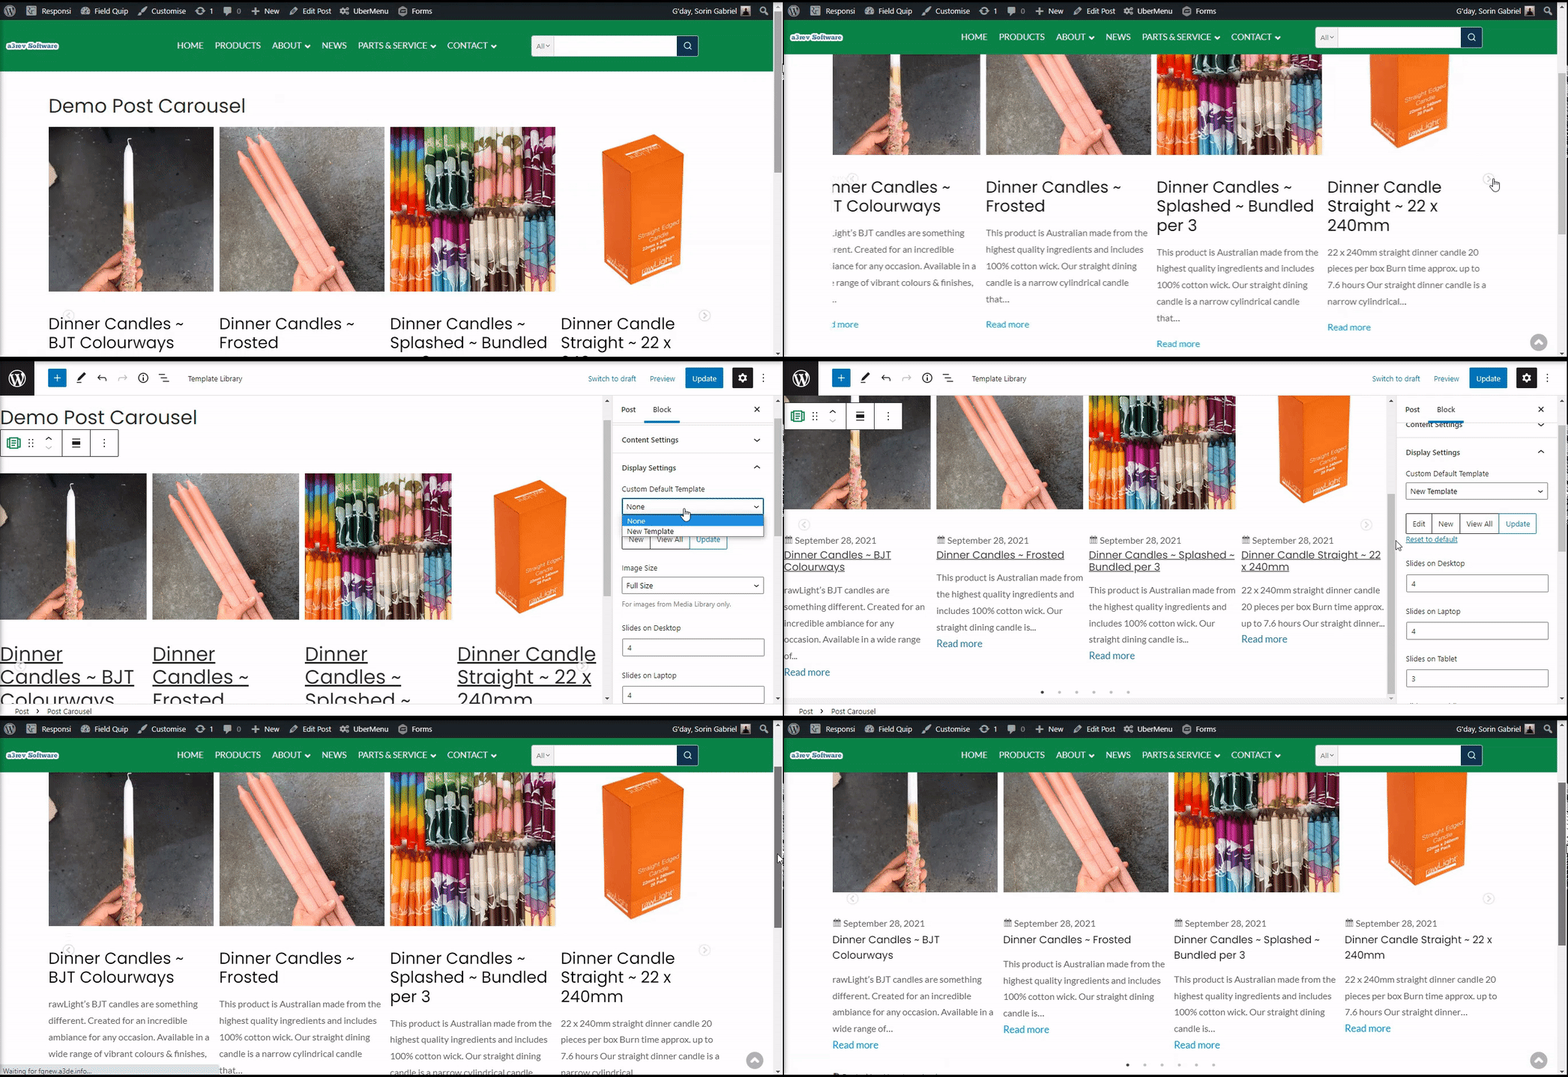
- Custom Default Template – If the Carousel Template is set as default this option will show. This is for the website using a classic theme. It will give the option to create a new template replacing the default one without adding a php template into the theme.
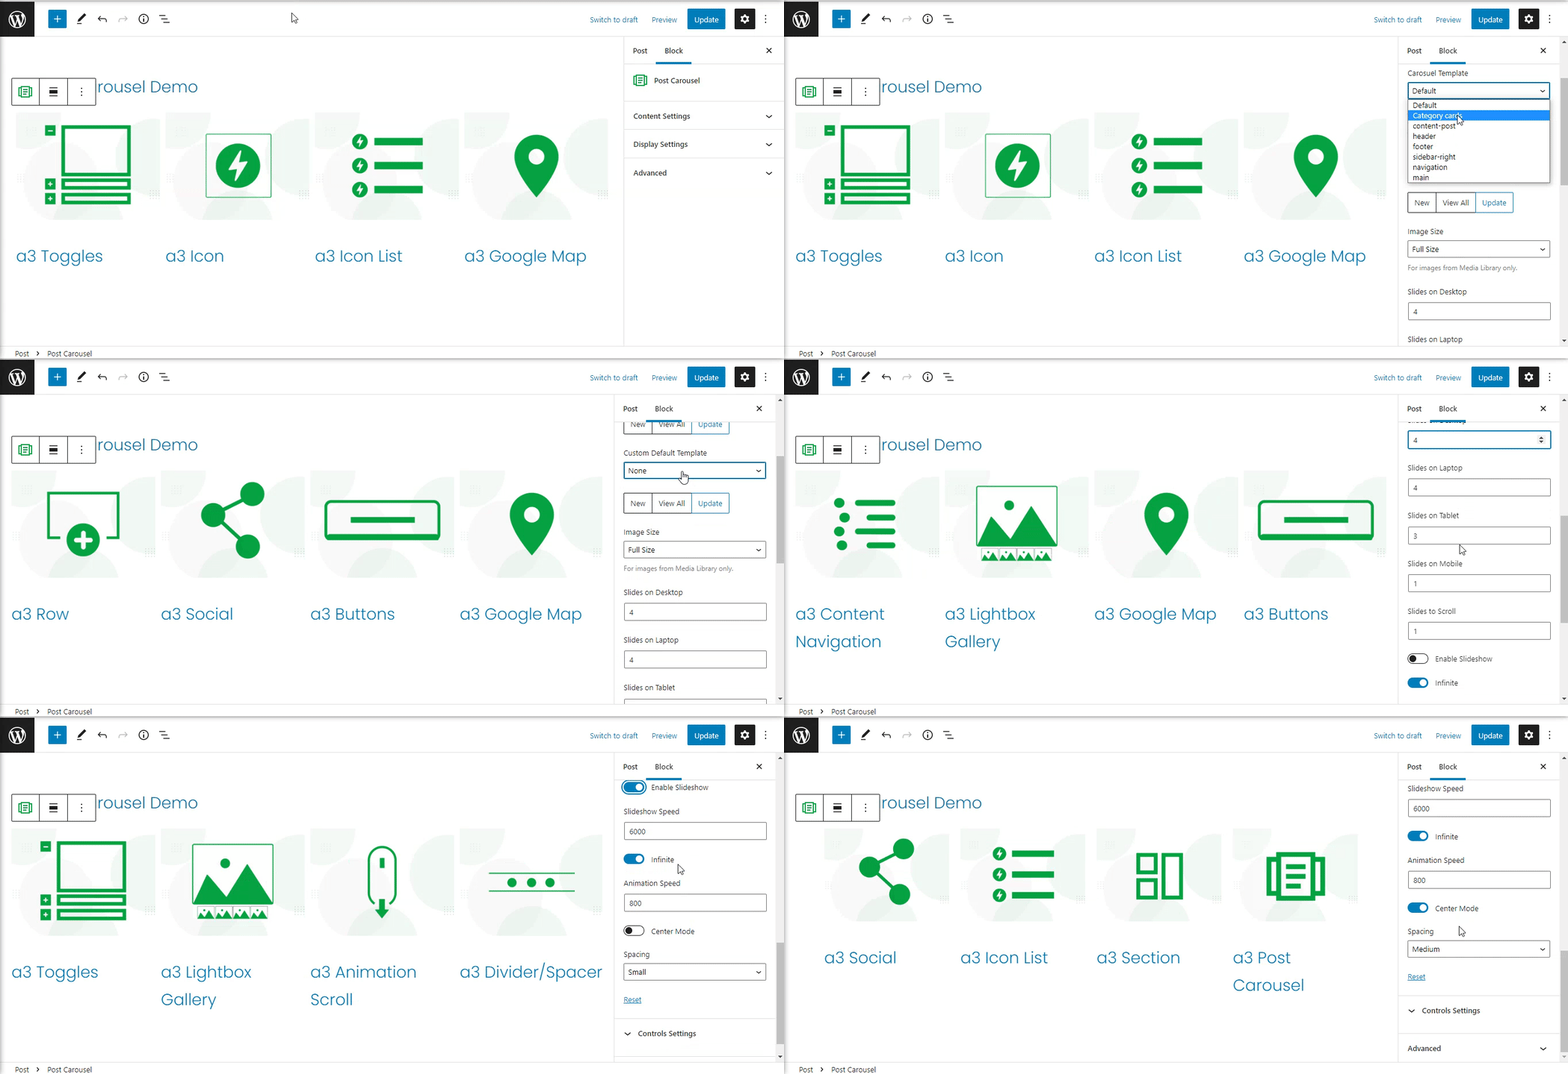
Control Settings
From the Control settings menu you can choose navigation icons, arrows or dots, for the slider.
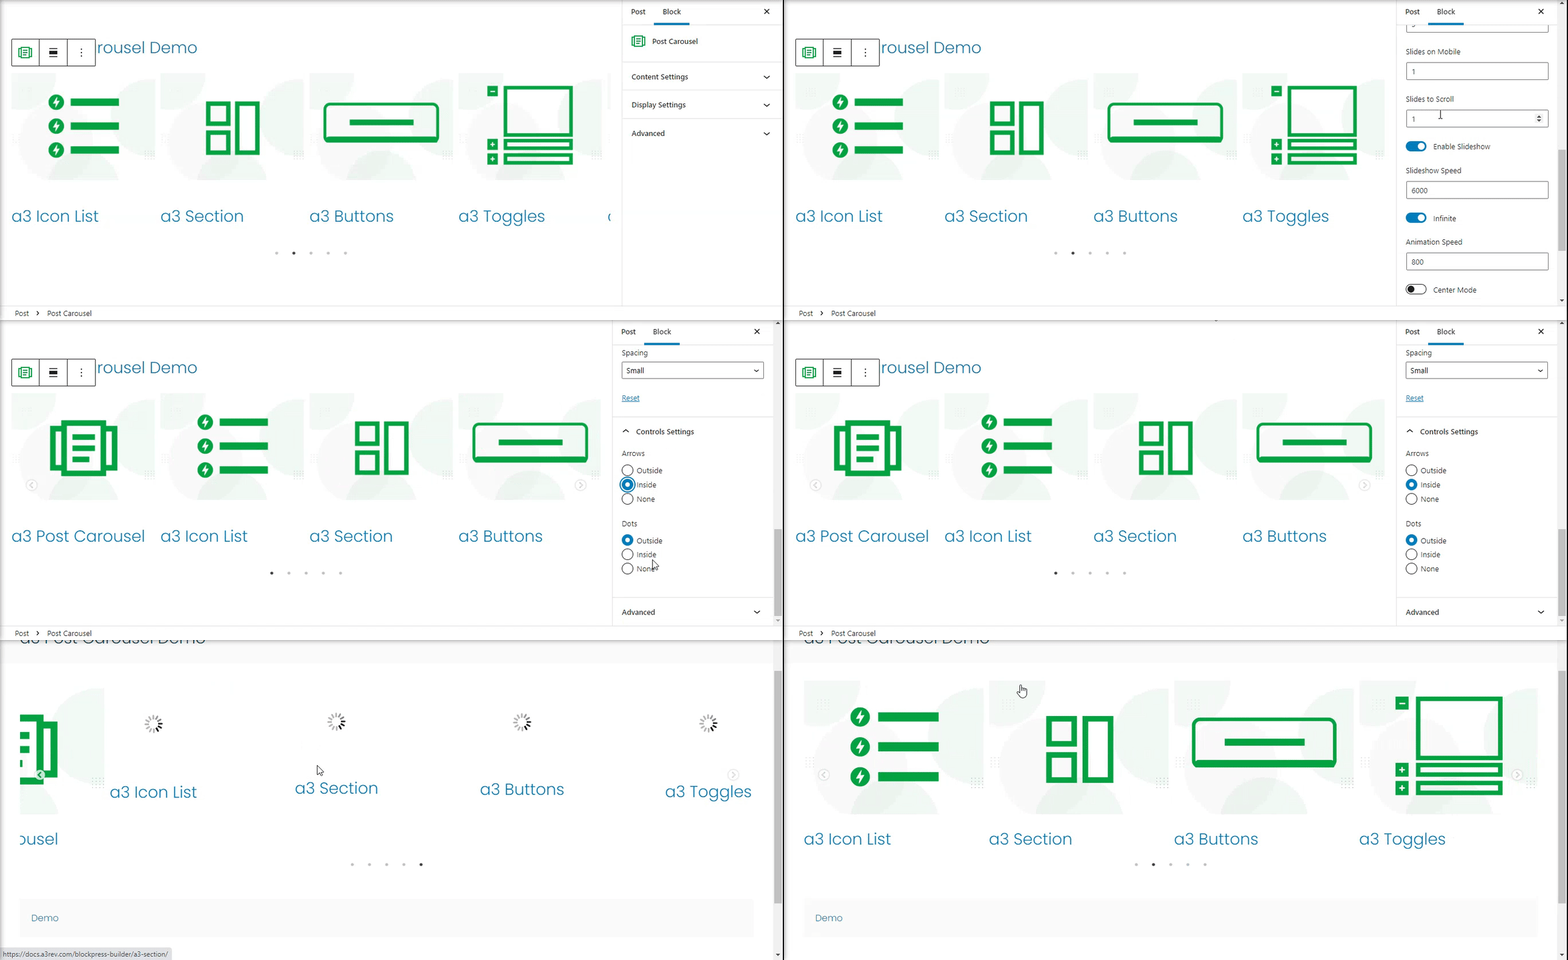
Post Carousel Template FSE theme
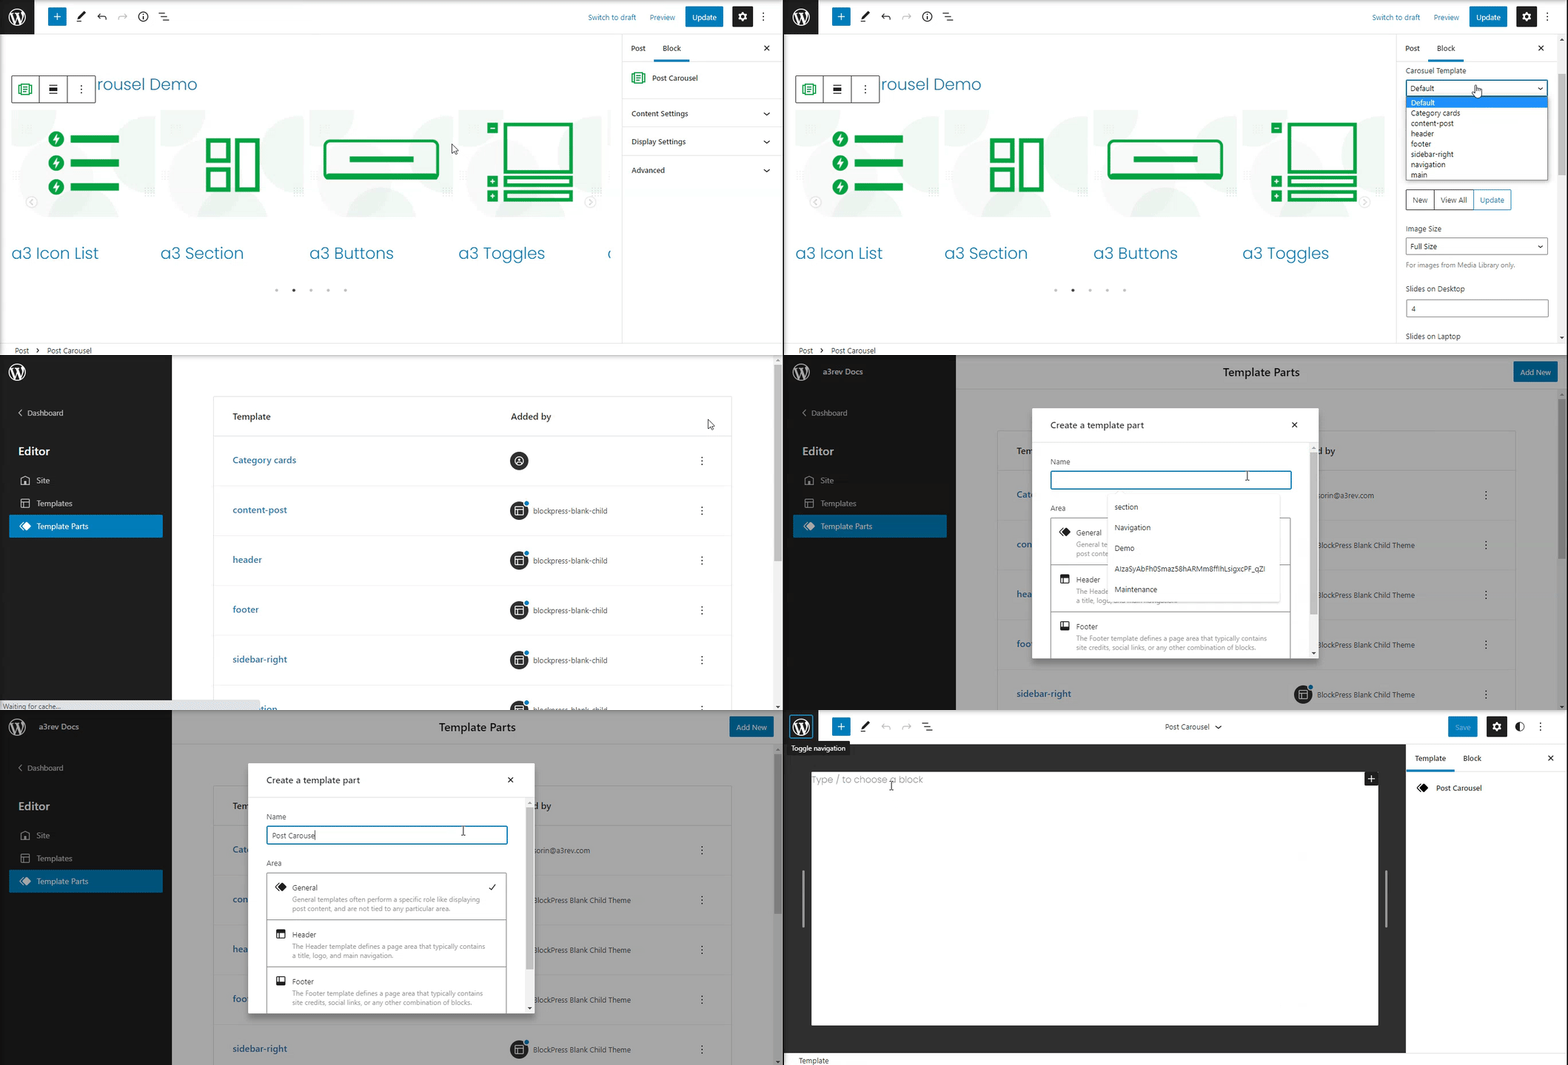
In this demonstration we have used the Gutenberg Full Site Editor Theme, so will have a look on how to create or edit a template for Post Carousel.
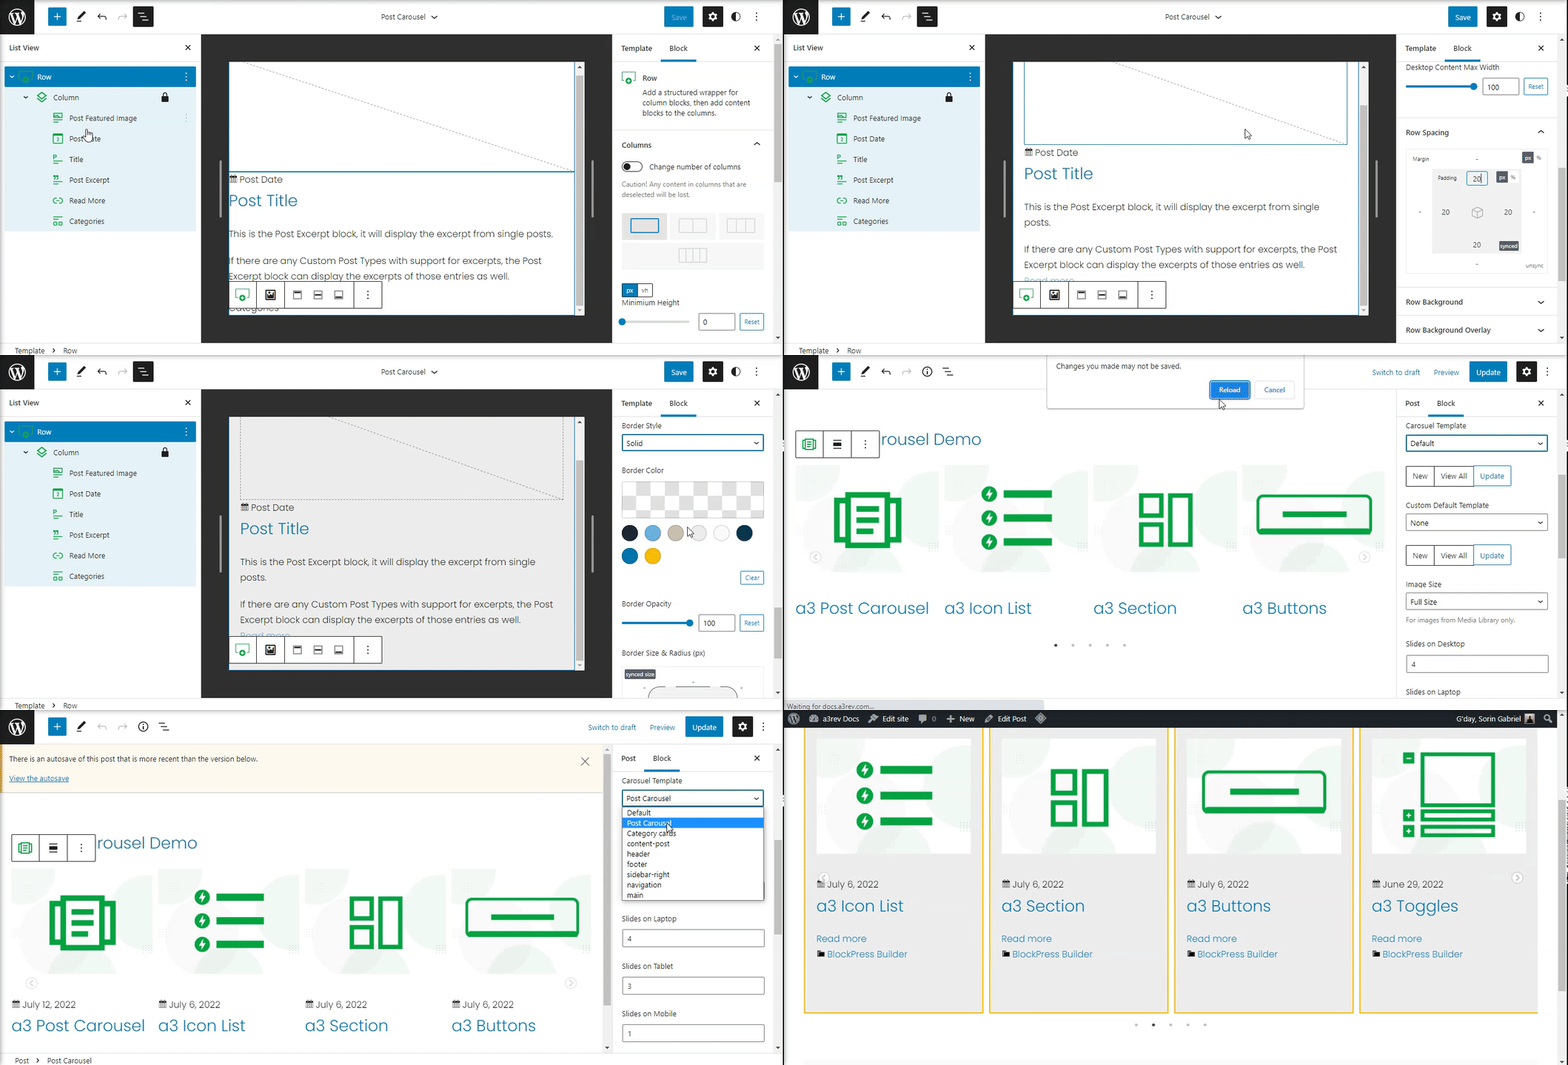
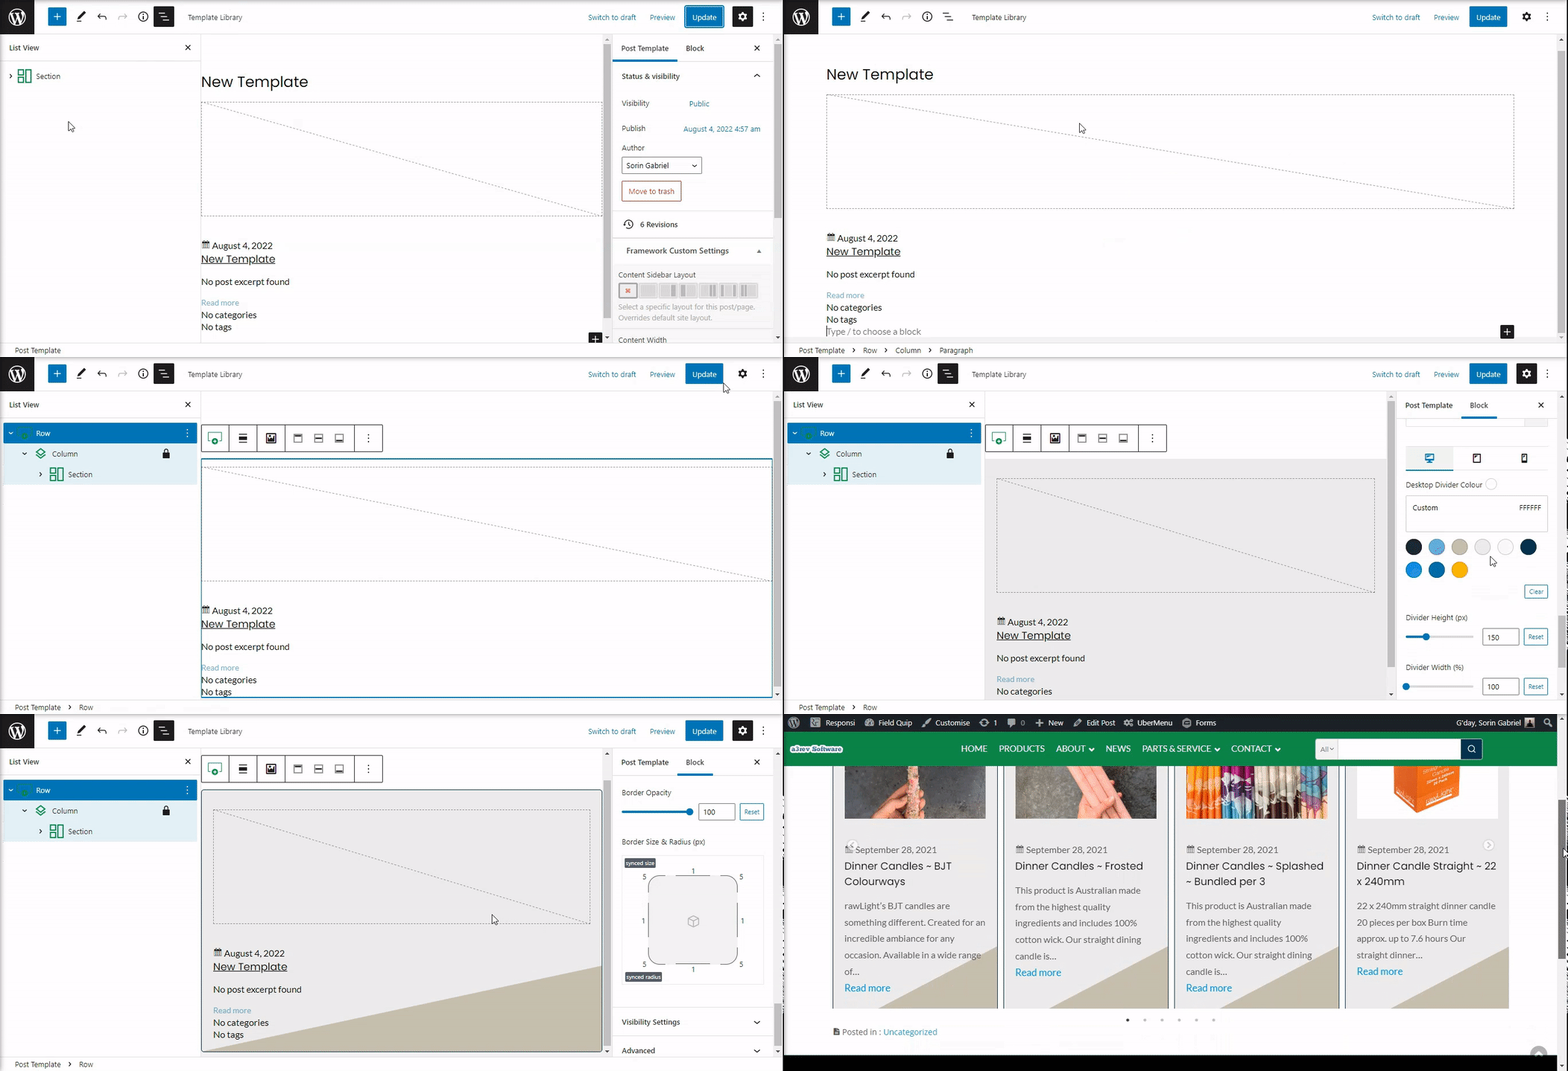
First thing to do is to create a new Template Part for our post cards. We are using A3 BLOCKPRESS POST BLOCKS collection to create the new template. This is a quick demo to show you step by step how easy is to create a unique design.
Step 1: Create a new Template Part
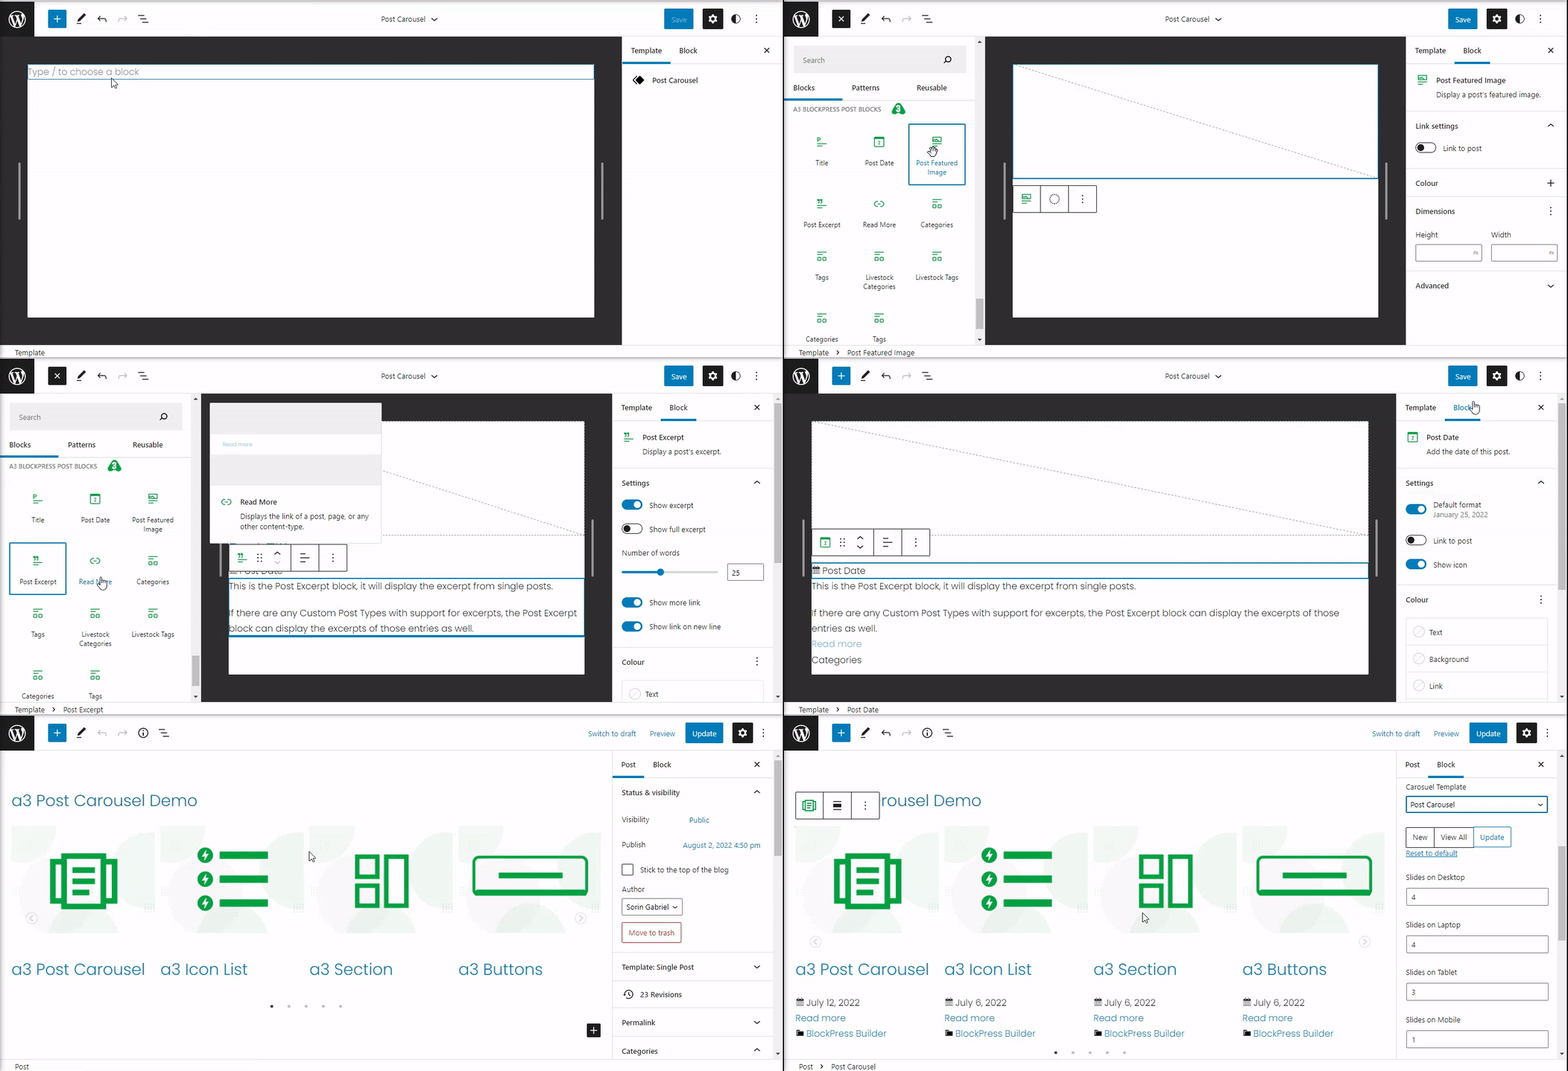
Step 2: Add from our BlockPress Post blocks collection any blocks you need in your new template. You can combine and use any block from your list. After the design of the post card is done, just choose the new template you create from the Carousel Template dropdown list.
Every block have their own settings. Read here the guide for a3 BlockPress Post Collection .
Style Card Container
If you want to style the card container by adding borders, shadows, spacing etc.. just need to combine the Post Carousel Block with a container block like Row Block.
Here we have a quick demo on how to add padding, borders, shadow and a background color for the post containers. We have used Row block and nested the Post Blocks under it. Any design made on Row block will be reflected on the container card of the posts.
Carousel Template Classic Theme
Is the exactly same principle like on Full Site Editor, just here instead of creating a new Template Part, will gonna replace the default one and be able to style or modify it for our needs.
Step 1: Create a new Custom Default Template and name it. If you don’t name your template it will not show in the dropdown template list.
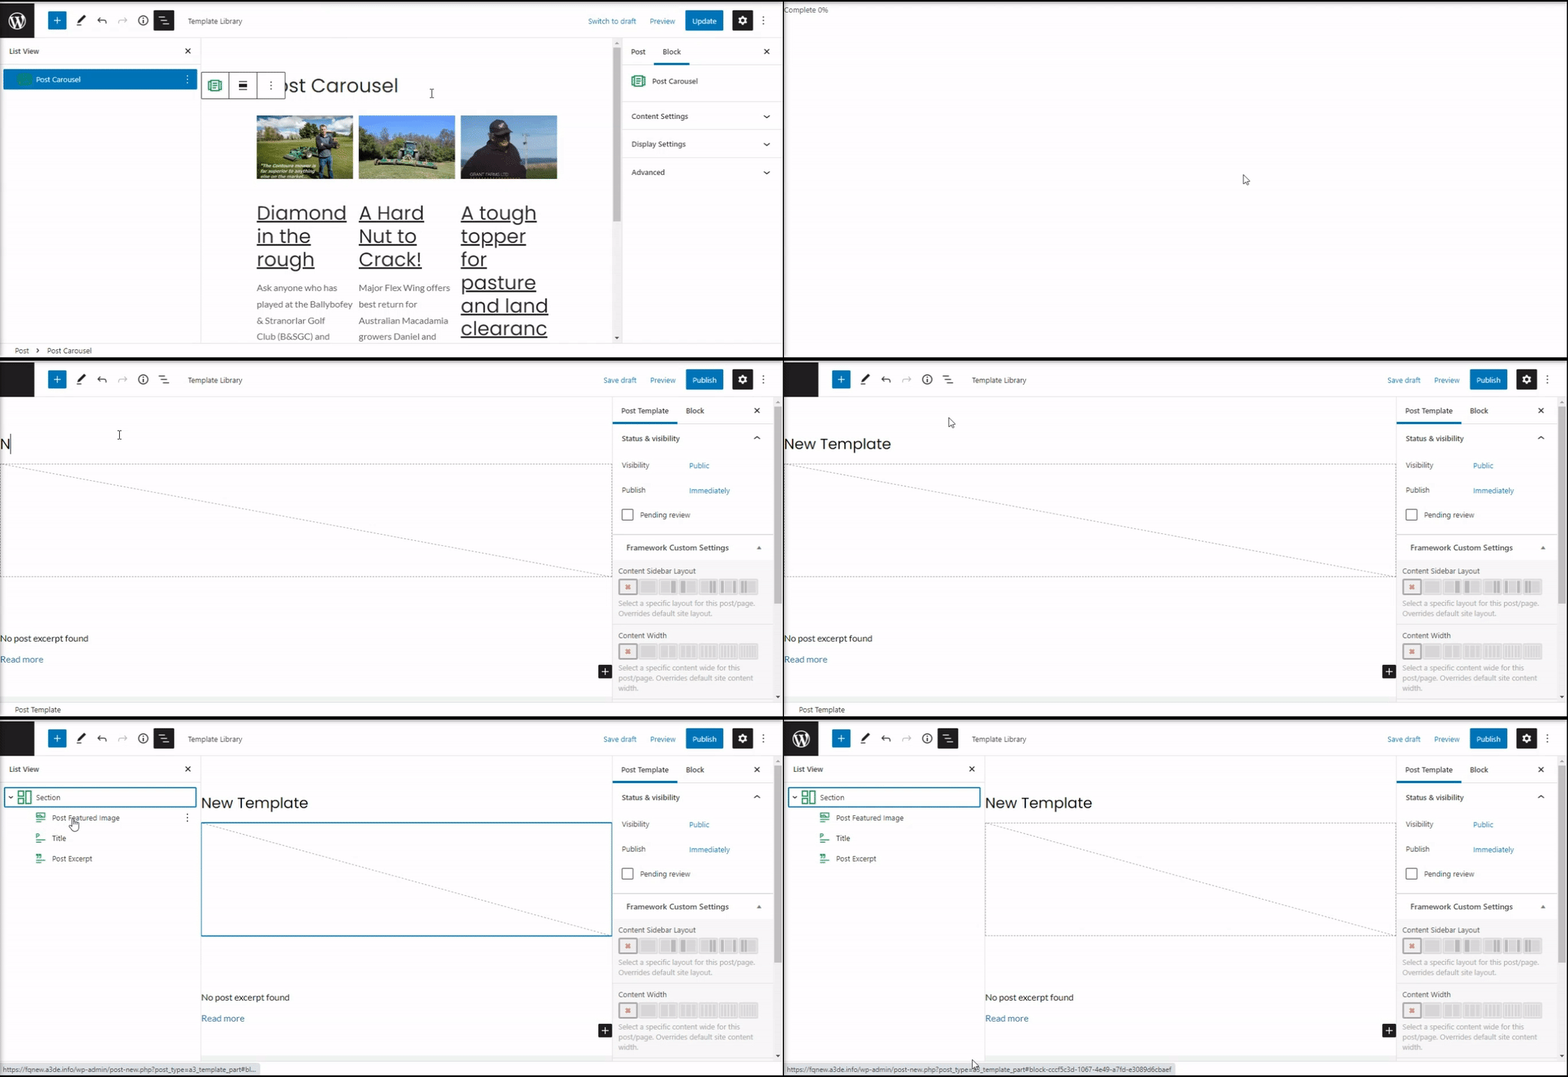
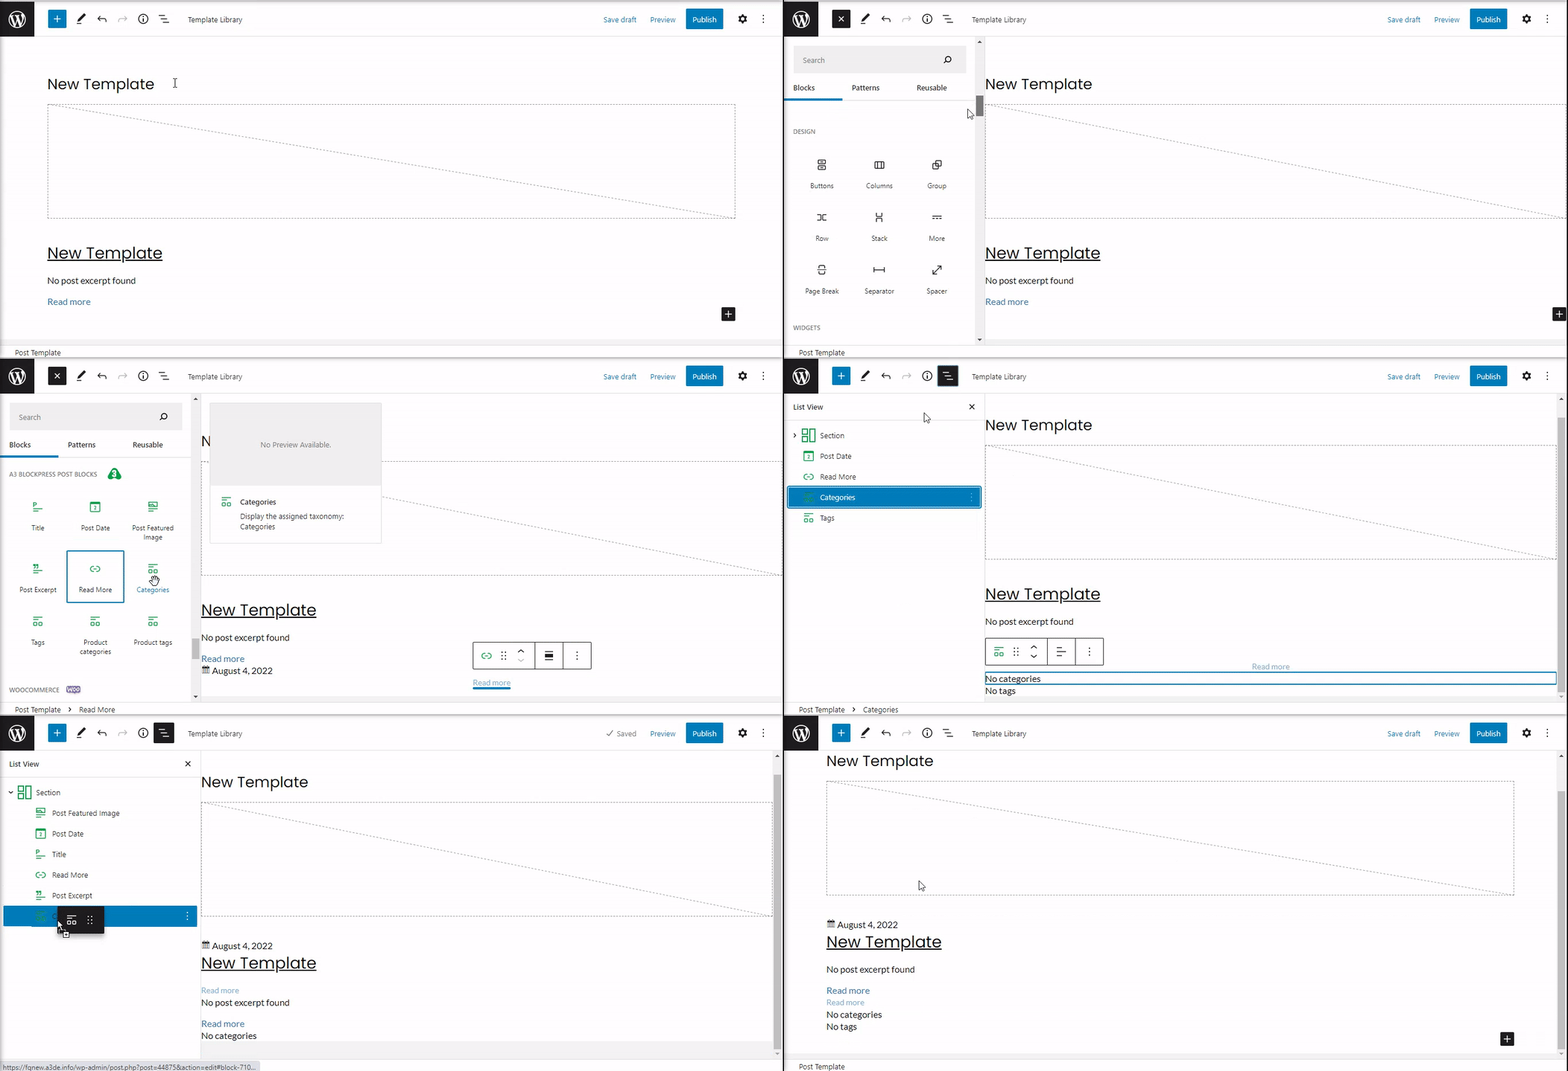
Step 2: Edit the blocks that are used for the post card elements. You can use any block, just nested them inside the Section block. Each block have their own settings. You can read the doc for a3 BlockPress Post Blocks HERE.
Step 3: Select the Template
Style Card Container
Like on Gutenberg Full Site Editor Theme the container of the post card can be style using a container block like a3 row block. Any design made on Row block will be reflected on the container card of the posts.
Advanced
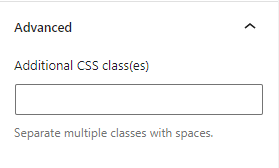
The advanced tab lets you add a CSS class to your block, allowing you to write custom CSS and style the block as you see fit.
