Plugin Install
Install Timeline plugin from a3 Dashboard > Plugins > a3 Timeline.
Once you have the plugin installed and activated it adds the a3 Timeline menu to your WordPress admin page menu.
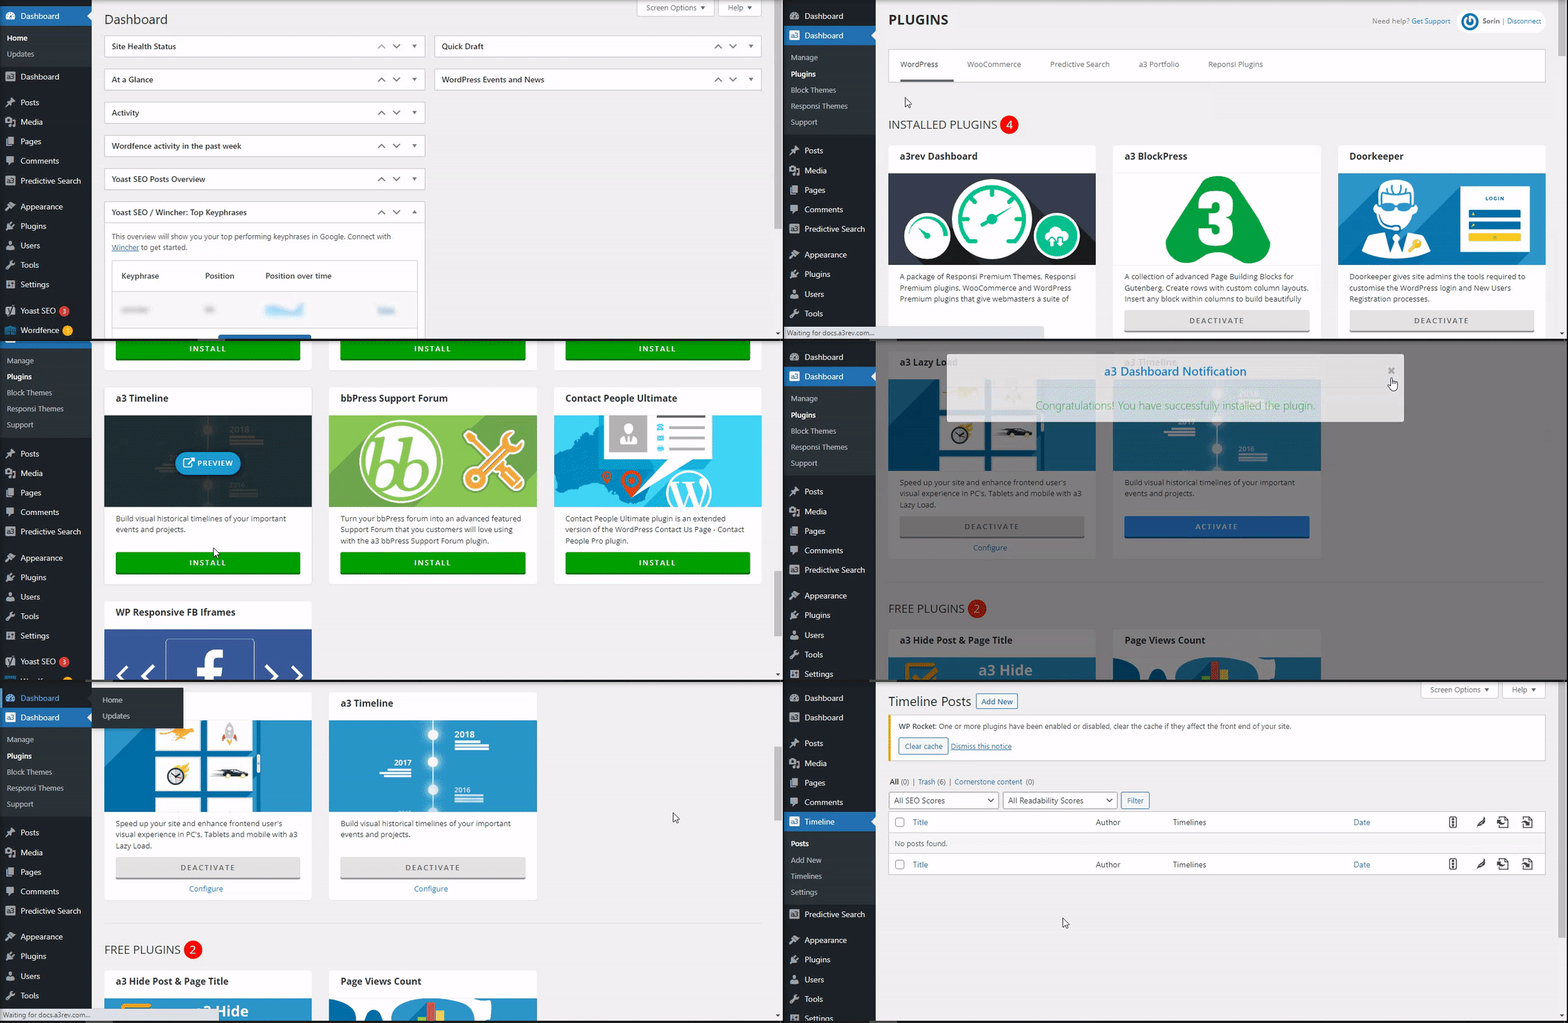
The first thing to do is to create some Timeline Items. Once that has been done we can then look at how the Items should display on the front end.
Add a New Item
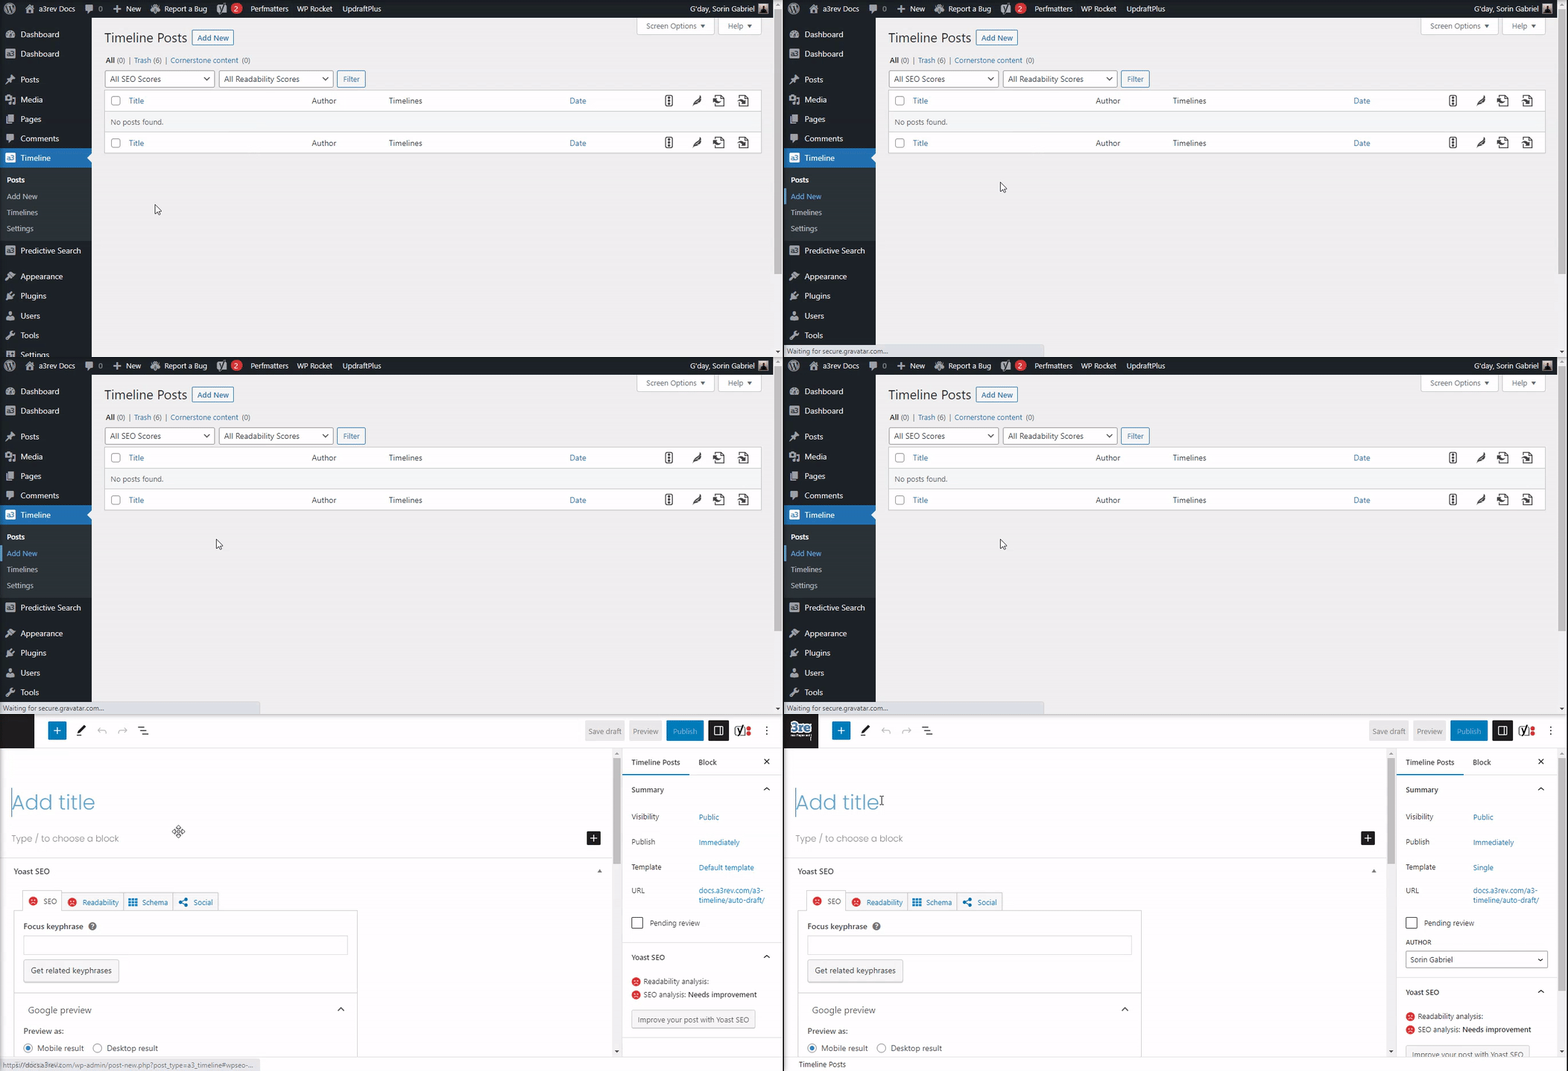
a3 Timeline allows you to create an unlimited number of Post Items. Items are WordPress custom post types using the block editor. By utilizing blocks, the content becomes significantly more flexible. So you know how to create a WordPress post then you know how to create a a3 Timeline Item, whit some few extra features.
Title and Description
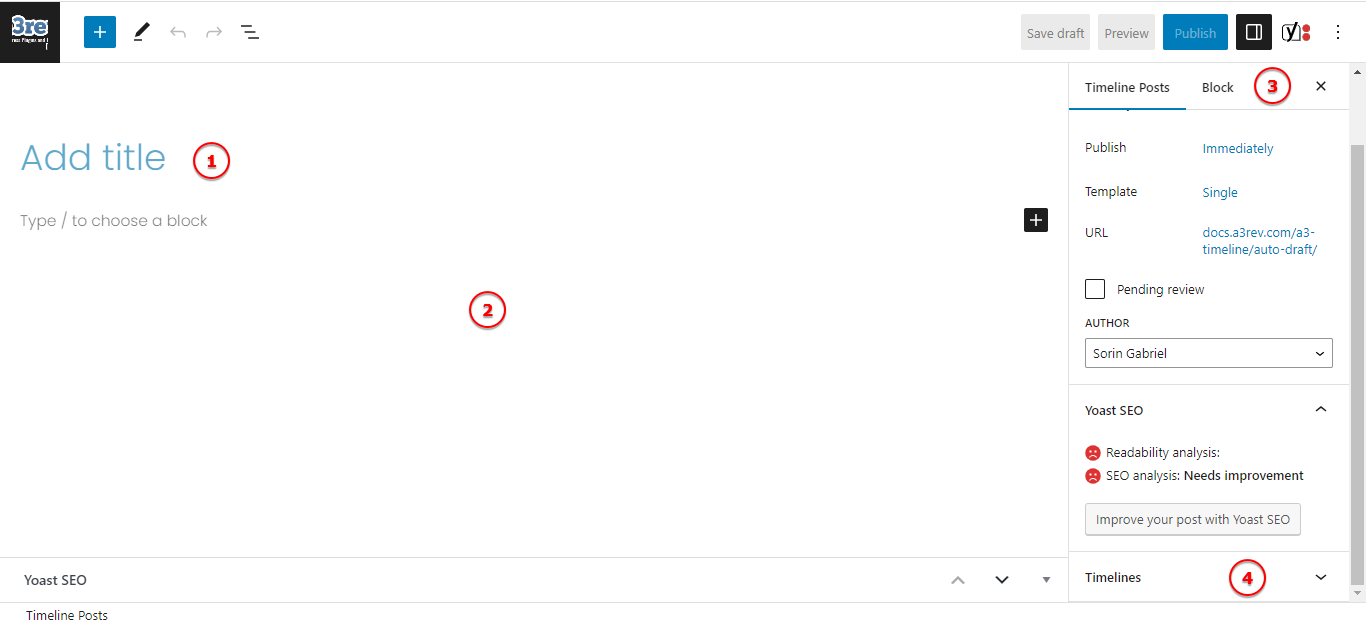
Image Legend
1. Title – This is the item post title. It will show as the title on the timeline. From settings can be set as a link making post title clickable and will lead user to the post.
2. Description – Next, we move on to the description of timeline items, which is the post body and can be edited using blocks (just like posts). The description shows under title.
3. Post Sidebar – Provides various options such as publishing, Template and other basic settings.
4. Timelines – Section on the bottom of the post sidebar. Similar to tags, this allows you to create timelines that can be selected from the post sidebar.
Create a Timeline
Create timelines with this interfacee.
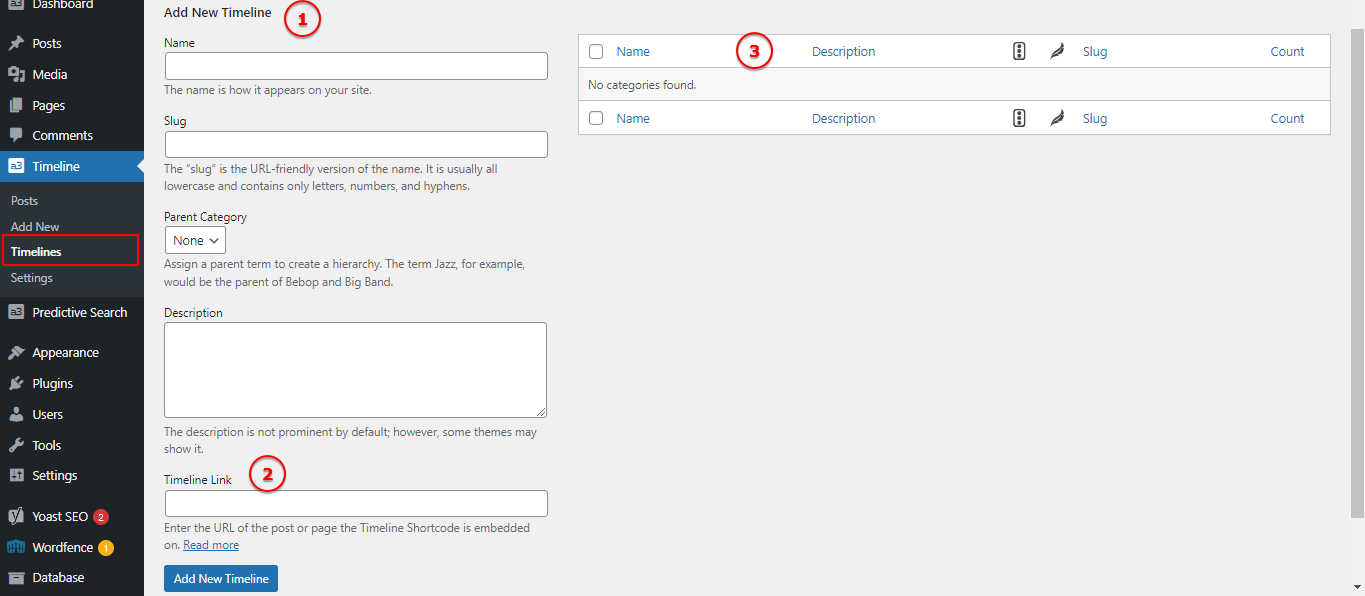
Image Legend
1. Add New Timeline – Add a title, slug, choose parent category if it’s need and add a description for your timeline item.
2. Timeline Link – Enter the URL of the post or page the Timeline Shortcode is embedded on. Read More about this feature above.
3. Timelines Meta Box – It provides an overview of the assigned timelines for a specific post.
Timeline Link
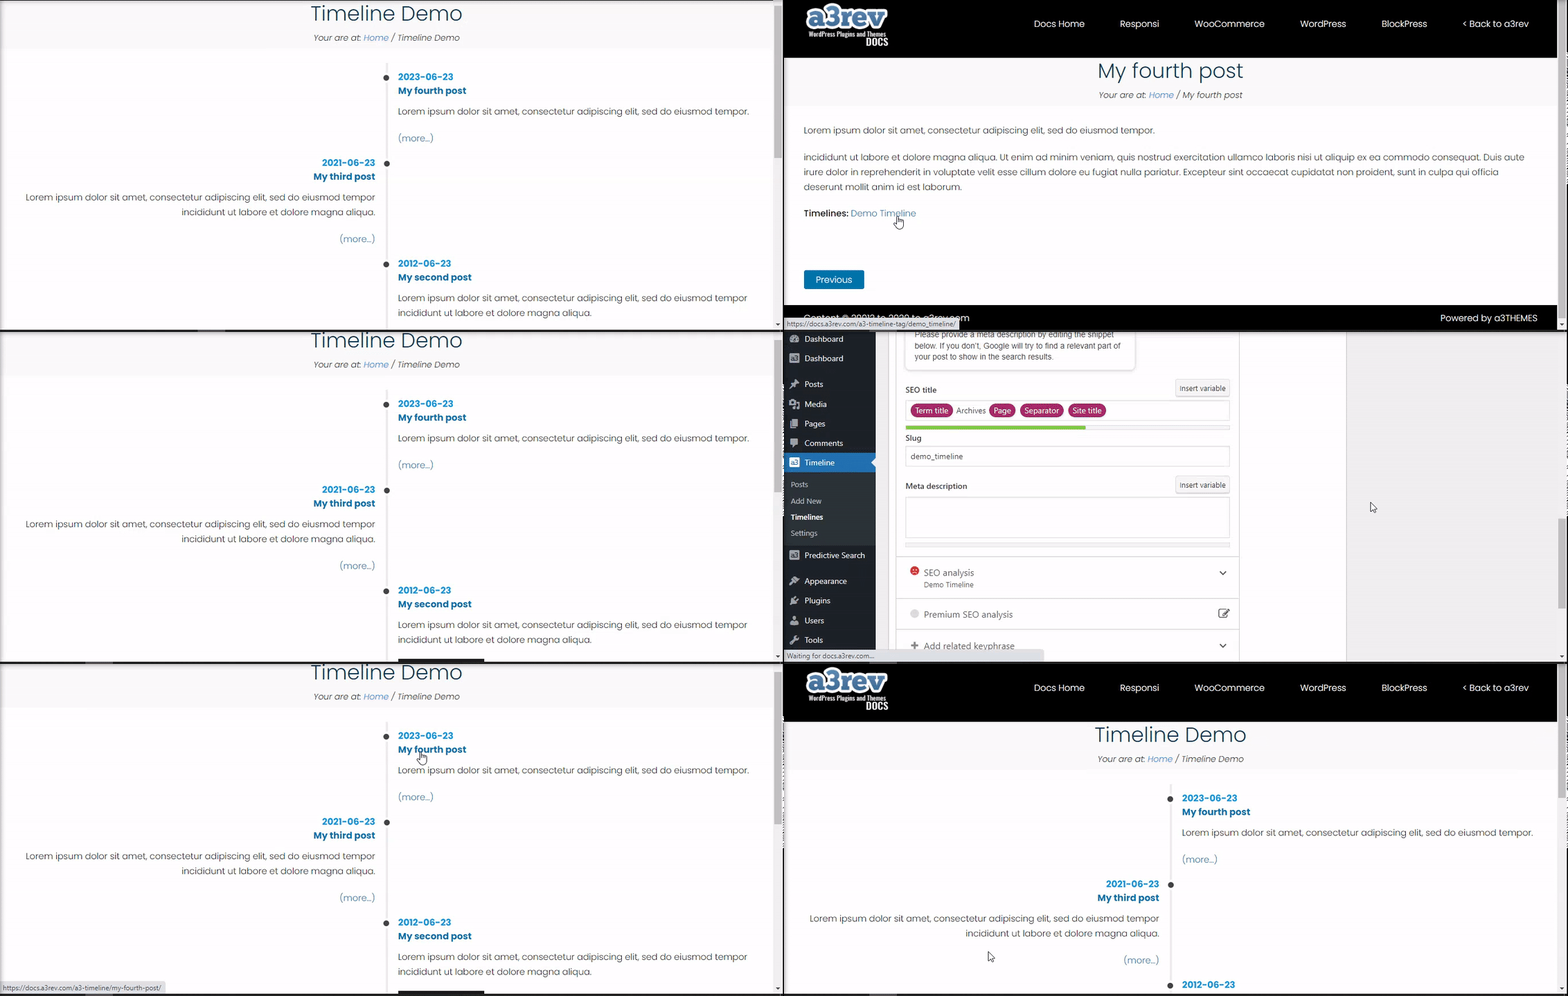
Once you have created a Timeline and used the shortcode to embed it on a page or post, copy that link and paste it here. When you do that and assign a Timeline post to a Timeline, a link is automatically created at the bottom of the post, similar to how posts Category and Tags meta works on normal posts. The difference is the link is to the Timeline and not a Category or Tag page.
For a clearer explanation of how this feature works, let’s explore its functionality without using a link. You will notice that by removing the link the link from the bottom of the post, it will automatically redirect to the Tags page. However, once you add the page link where the shortcode is located, the bottom link will then redirect back to the timeline. This seamless redirection makes it extremely convenient for visitors to navigate back to the timeline, enhancing the overall user experience.
Settings
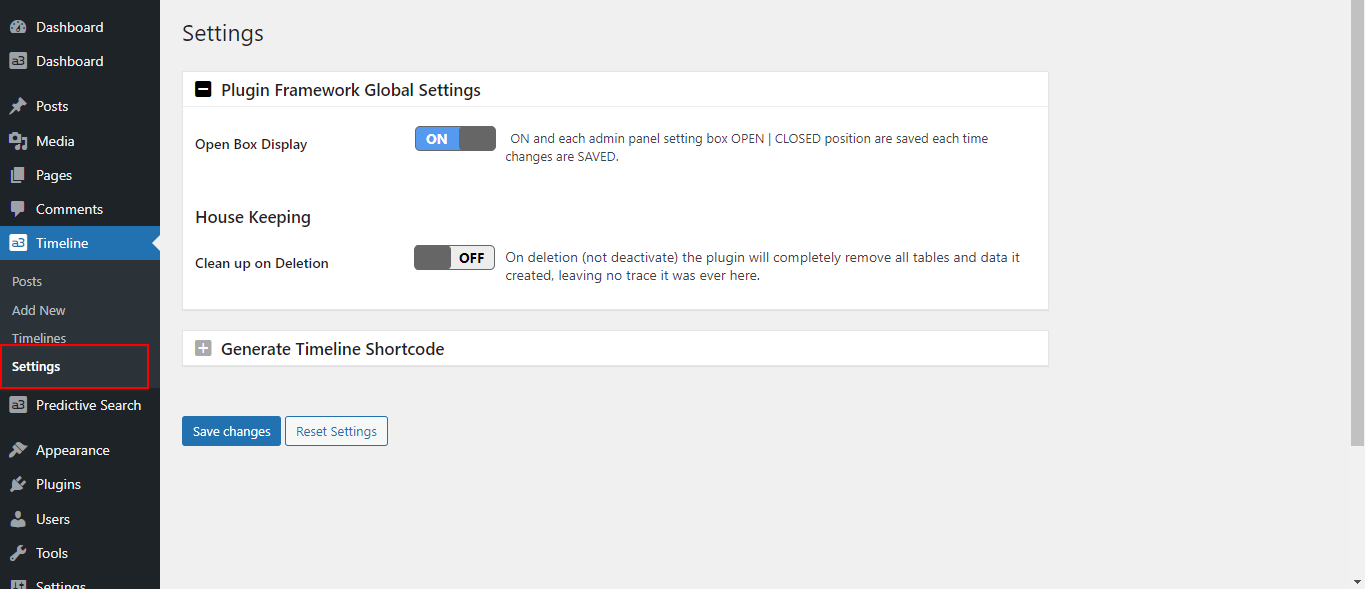
Plugin Framework Global Settings

Image Legend
1. Open Box Display – ON and each admin panel setting box OPEN | CLOSED position are saved each time changes are SAVED.
2. Clean up on Deletion – On deletion (not deactivate) the plugin will completely remove all tables and data it created, leaving no trace it was ever here.
Generate Timeline Shortcode
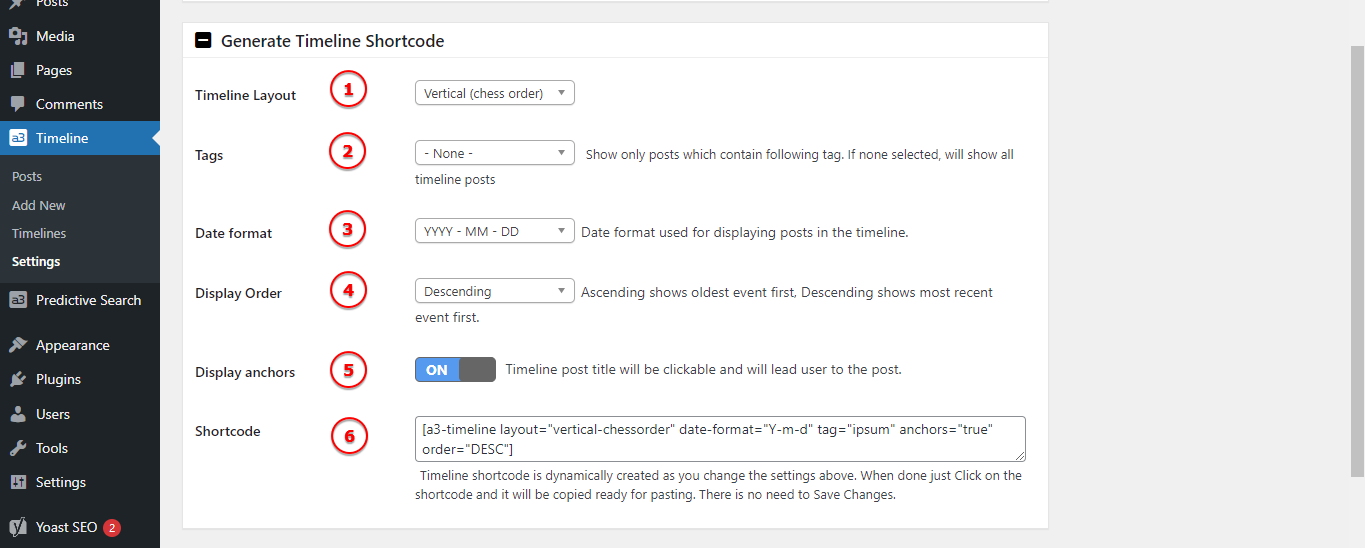
Image Legend
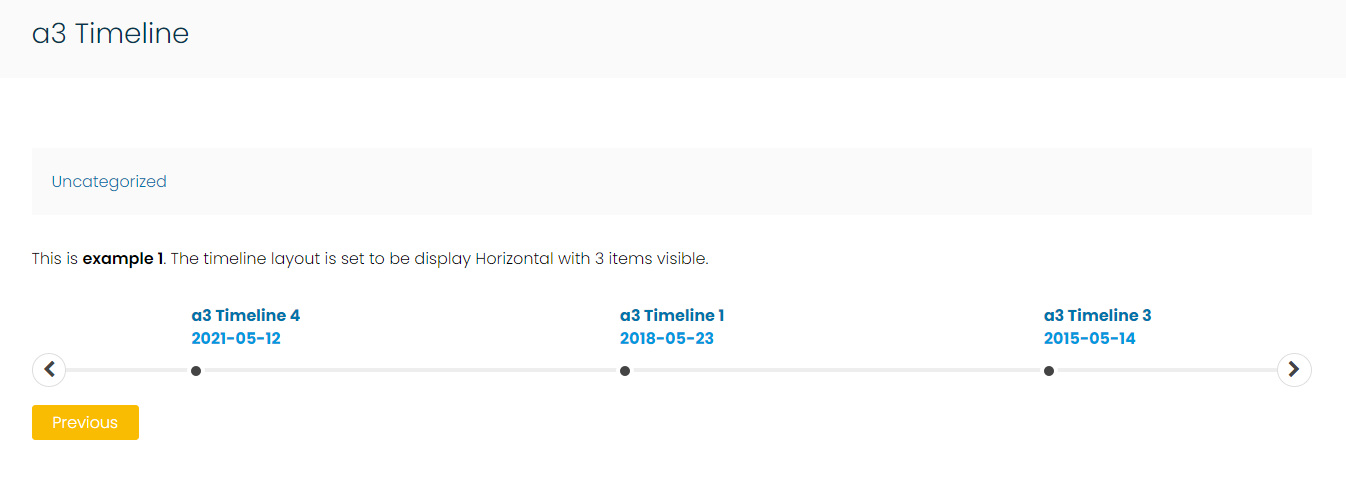
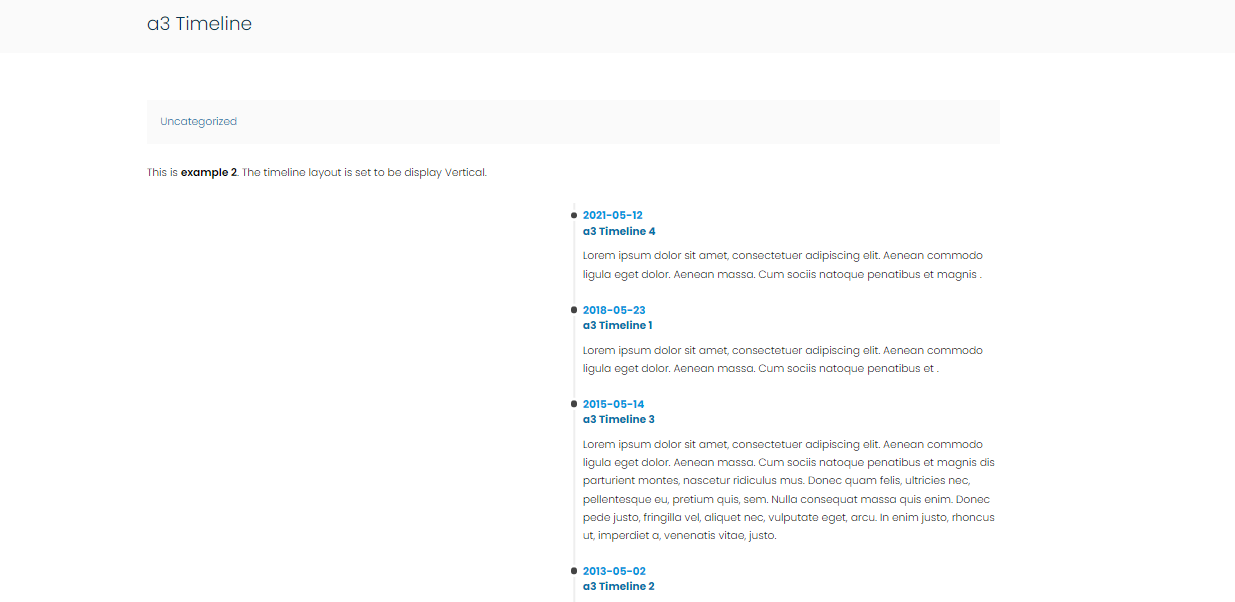
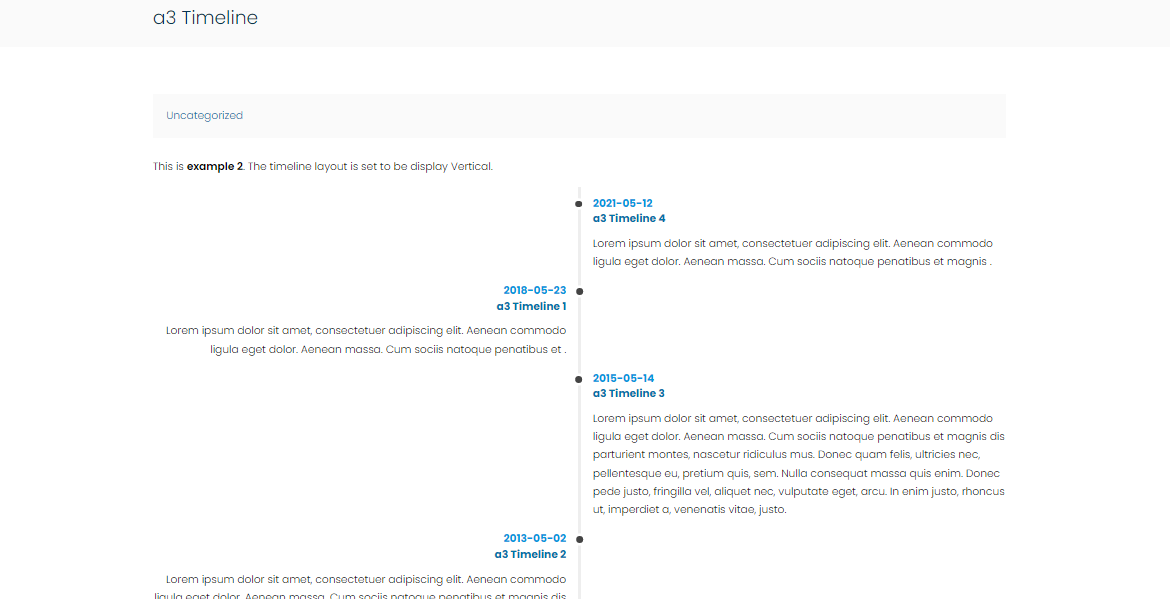
1. Timeline Layout – You can choose from 3 type of layout: Horizontal ( example 1 ), Vertical ( example 2 ), Vertical Chess Order ( example 3 ). See the example bellow this info box.
2. Tags – Select the tags to be use in the shortcode. Show only posts which contain following tag. If none selected, will show all timeline posts .
3. Date format – Date format used for displaying posts in the timeline.
4. Display Order – Ascending shows oldest event first, Descending shows most recent event first.
5. Display anchors – Timeline post title will be clickable and will lead user to the post.
6. Shortcode – Timeline shortcode is dynamically created as you change the settings above. When done just Click on the shortcode and it will be copied ready for pasting. There is no need to Save Changes.
* 7. Visible items limit – Visible items limit is used for “Horizontal” layout ( see example 1 )
Timeline Horizontal (example 1)
Timeline Vertical (example 2)
Timeline Vertical Chess (example 3)
Tips & Tricks
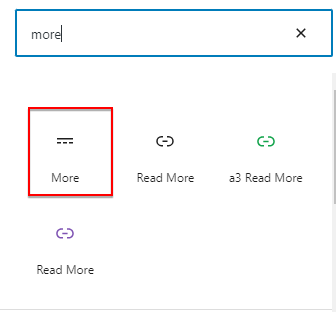
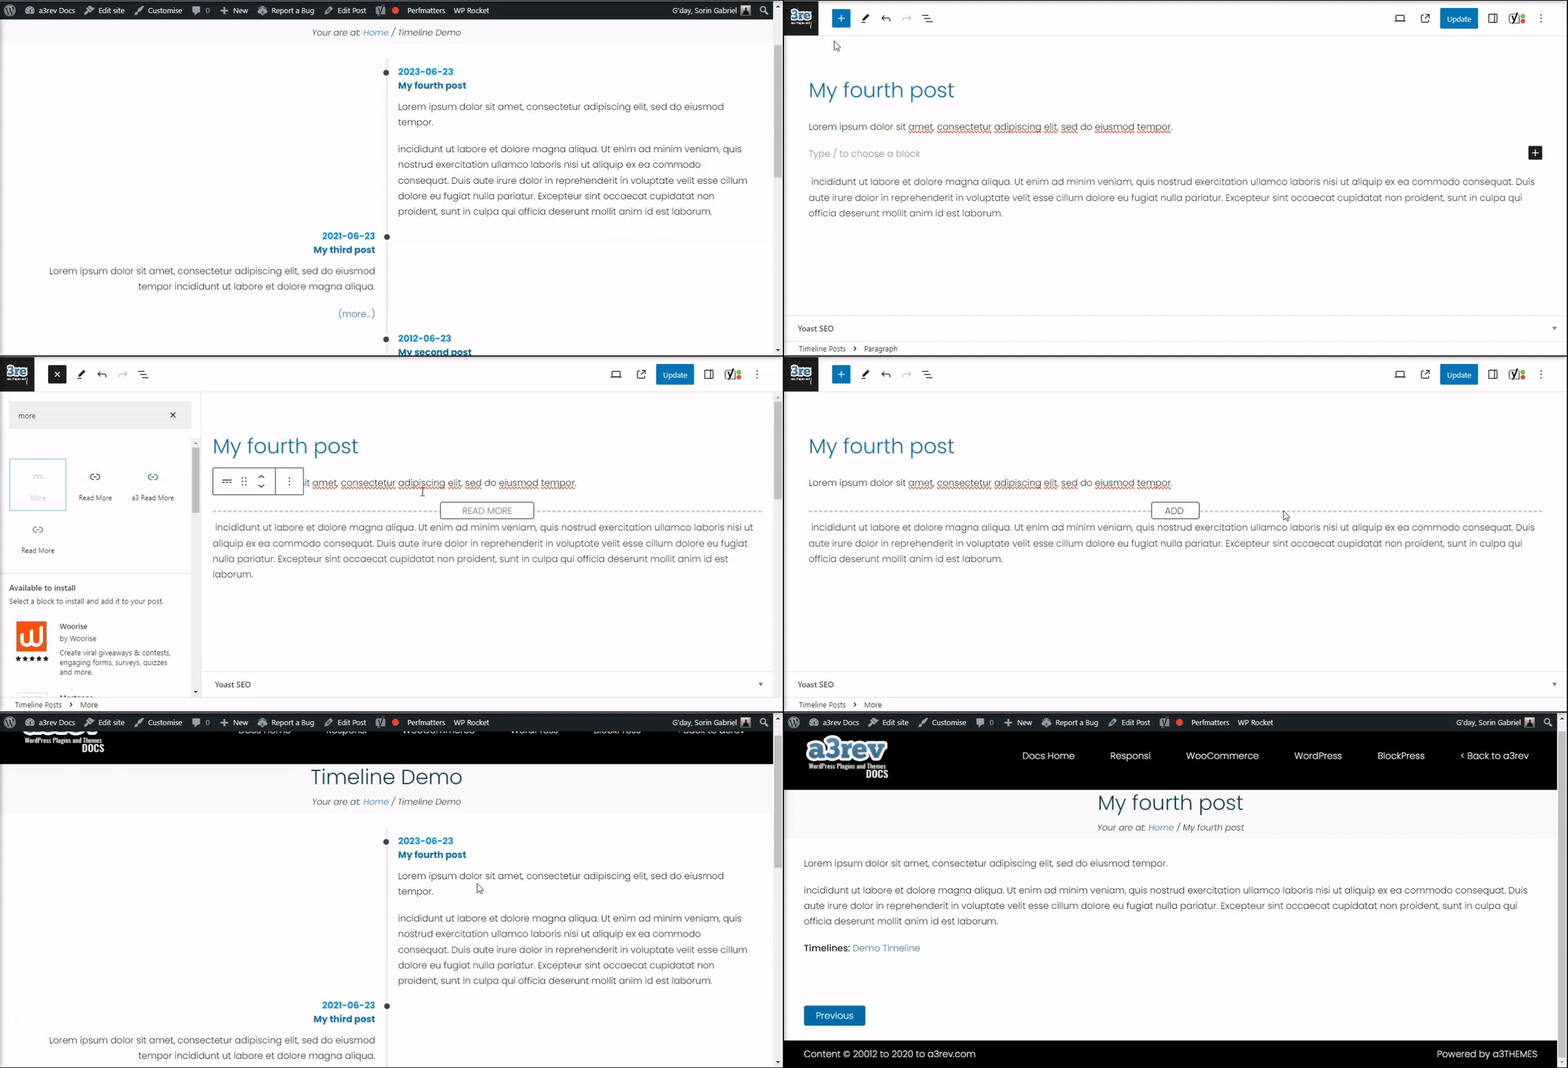
The “More” block’s primary function within the timeline is to regulate the amount of content displayed initially. This is particularly beneficial when dealing with posts that feature extensive content. By displaying the initial segment of the post alongside a “Read More” link, you optimize the way these content-rich posts are showcased.You can customize the text as you need.
